Help please with aligning the Cupix tour to the BIM model10963
Pages:
1

|
Joakim360 private msg quote post Address this user | |
| Hello WGAN forum I'm having some problems aligning the cupix tour to the BIM model. I want to show them side-by-side in the split screen view. Does anyone here have any experience in that area? Kind Regards Joakim360 |
||
| Post 1 • IP flag post | ||
 WGAN Forum WGAN ForumFounder & WGAN-TV Podcast Host Atlanta, Georgia |
DanSmigrod private msg quote post Address this user | |
| @Joakim360 Can you post some screen grabs showing the challenge? Dan |
||
| Post 2 • IP flag post | ||

|
Joakim360 private msg quote post Address this user | |
Sure Dan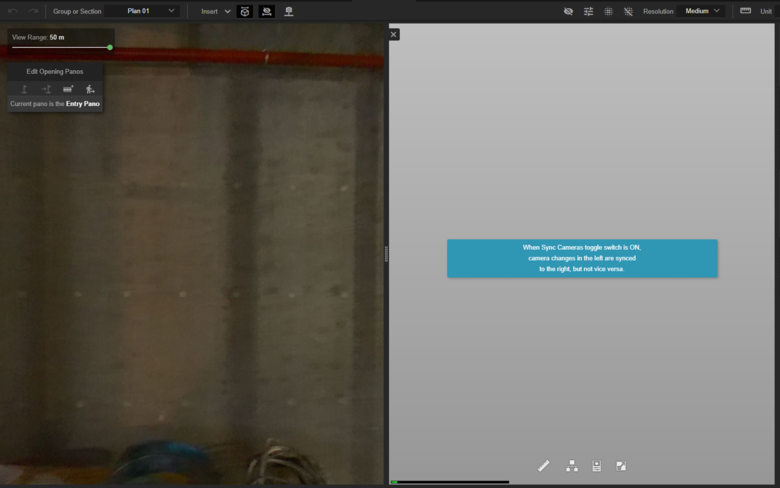 It just freezes in this screen. There might be something wrong with the BIM file. Cupix support is looking into it right now. The file is a .nwd file that include multiple models. |
||
| Post 3 • IP flag post | ||
|
|
Caroline_Cupix private msg quote post Address this user | |
| Hi Joakim! Have you tried the steps outlined in this article? https://support.cupix.com/support/solutions/articles/27000048800-comparing-3d-tours-to-a-bim-model Let me know if you're still experiencing any problems! -Caroline |
||
| Post 4 • IP flag post | ||

|
Joakim360 private msg quote post Address this user | |
Quote:Originally Posted by Caroline_Cupix I'm sure I'm doing something wrong relating to aligning the two models. I dont know how to do the following step in the articcle: "Align the floor plan image with the BIM coordinate system. Use the Transform Image tool to edit the location, the scale, and the rotation angle of the image, matching the floor plan to the BIM model" Here is what I have done: 1. Uploaded the BIM file. It's in NWS (Autodesk Navisworks Format): 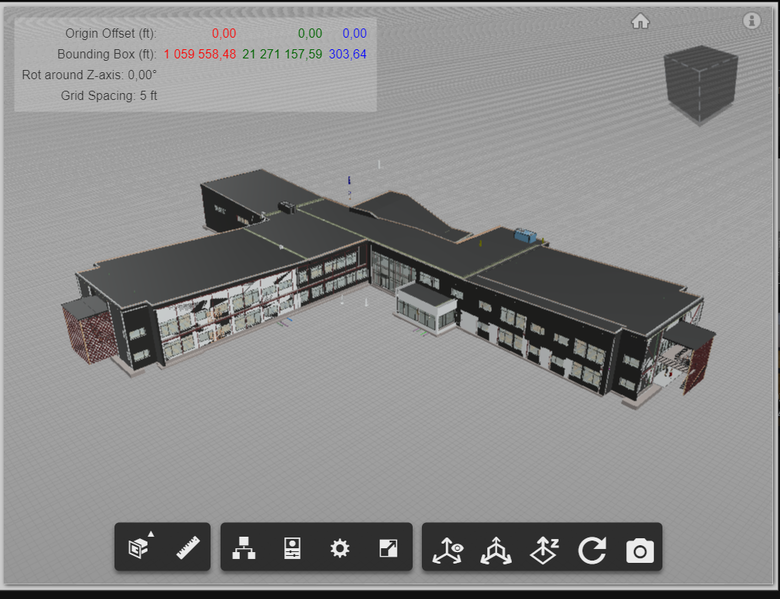 2. I have aligned the mapped panos and a section of the floorplan 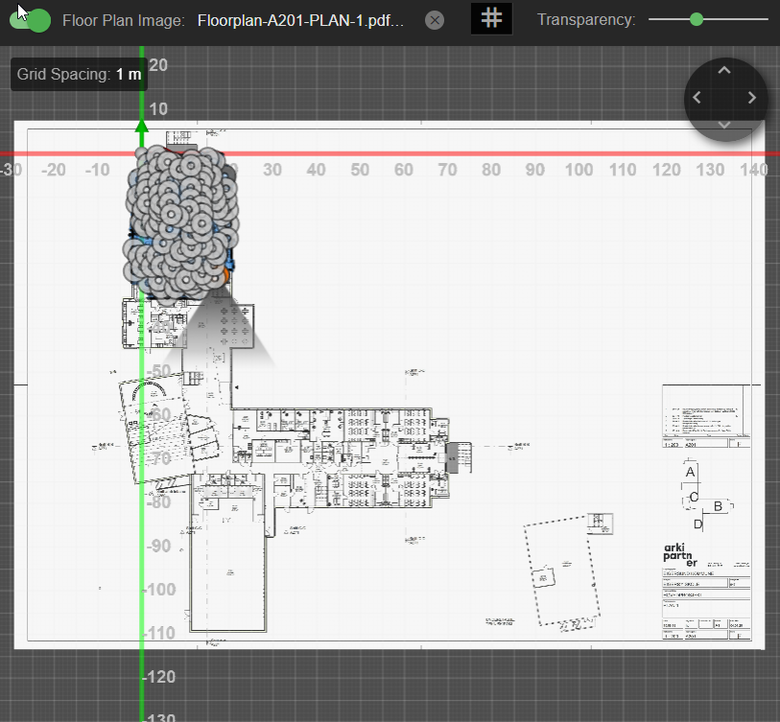 |
||
| Post 5 • IP flag post | ||
|
|
Caroline_Cupix private msg quote post Address this user | |
| "Align the floor plan image with the BIM coordinate system." - This means that the BIM and floor plan should use the same origin point and same scale. You can make these adjustments to the floor plan from the Layout tab. Setting the origin point: On your BIM model, identify the origin point. Make sure the origin point of the floor plan is in the same location as the origin point in the BIM model. If not, you can click and drag the floor plan so that origin point is at the intersection of the x and y axis. You can refer to 'Aligning the Floor Plan to a Section' in the following article. This will talk about how to "Use the Transform Image tool to edit the location, the scale, and the rotation angle of the image[...]." Make sure 'Lock Position' is off if you need to move the floor plan, and to turn on 'Lock Position' once the origin point is set (so you don't accidently click and drag the floor plan later when making your edits): https://support.cupix.com/support/solutions/articles/27000048806-adding-a-floor-plan Setting the scale: To scale the floor plan, you need to know the value of at least one dimension in your BIM model. It's best to use a large dimension, ie. a straight wall of your building, the length of a long hallway. From the toolbar in the upper right hand side, click 'Measure a Distance'. On the floor plan, click the starting and ending points of the dimension that you know the value of. You should see a green arrow with a distance measurement appear on your floor plan. Press escape and double click on the distance measurement and enter the value on the 'Real Value' line and press 'Ok'. The floor plan will be scaled to that value. Here's a more in-depth article on adjusting the scale: https://support.cupix.com/support/solutions/articles/27000053630-how-to-adjust-the-scale Once you're done with aligning the 360 photos to your floor plan, you should be able to view them with the BIM model. Let me know if you need any additional help! |
||
| Post 6 • IP flag post | ||

|
Joakim360 private msg quote post Address this user | |
| Thank you Caroline Cupix support helped me align the floorplan with a different BIM of the same site 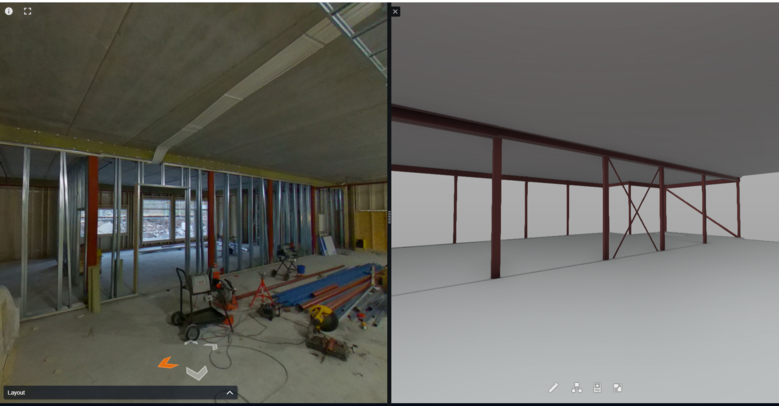 I will keep working and post here if I get stuck again |
||
| Post 7 • IP flag post | ||

|
Joakim360 private msg quote post Address this user | |
When adding .nwd-files (Autodesk Navisworks Format) there are no origin point on within the asset. How do I add this? Could you please show me with a video? no origin point On revit files (rvt) you can clearly see the origin point 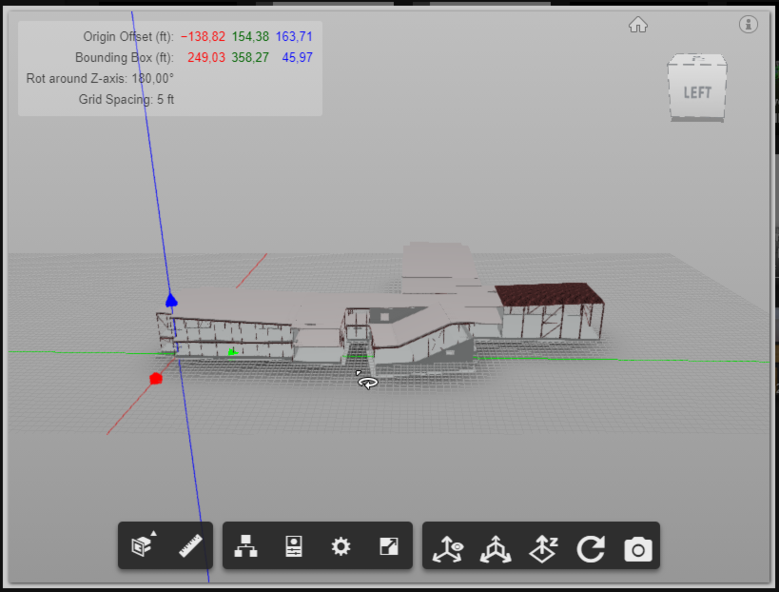 |
||
| Post 8 • IP flag post | ||

|
Joakim360 private msg quote post Address this user | |
| This has now been resolved. The source of my problems was my .nwd-file (Navisworks). The problem was that some of the models was to far away from the 0.0.0 point. You can spot this in Cupix if you see unnatural high numbers in the Bounding Box or Origin Offset fields. If you ever experience something similar it can be solved by manually moving all the models closer to the models origin point (0.0.0) and then export a new .nwd-file. More information here: http://support.insitevr.com/en/articles/1395412-navisworks-distant-origin-point I would like to thank Paul Collart and the rest of the Cupix team for assisting me in this issue. |
||
| Post 9 • IP flag post | ||

|
Joakim360 private msg quote post Address this user | |
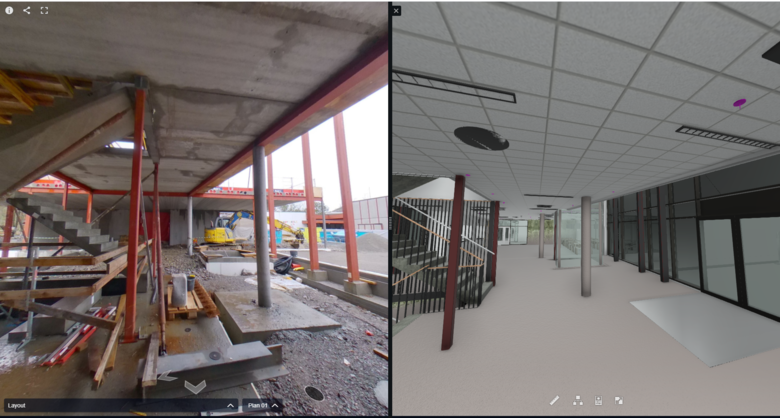 I'm very happy with the end result |
||
| Post 10 • IP flag post | ||
Pages:
1This topic is archived. Start new topic?


