


WGAN-TV eBook: How to Get Started with SIMLAB STAGES: a Deep-Dive Demo20291
Pages:
1
 WGAN Forum WGAN ForumFounder & WGAN-TV Podcast Host Atlanta, Georgia |
DanSmigrod private msg quote post Address this user | |
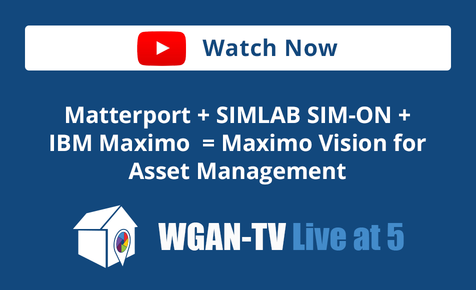
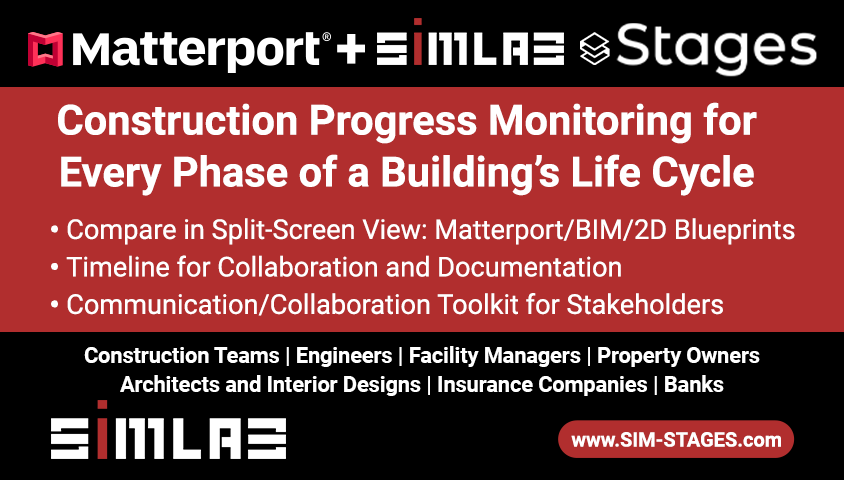
| SIMLAB is a WGAN Marketing Partner --- WGAN-TV | How to Get Started with SIMLAB STAGES: a Deep-Dive Onboarding Training Demo | Guest: SIMLAB STAGES Product Owner Robert Czarlewski | Wednesday, 18 September 2024 | Episode: 226 | www.SIMLABinc.com and www.SIM-STAGES.com @Jedrzej @SimlabSales @SIMLAB  WGAN-TV Podcast | WGAN Forum Podcast  WGAN-TV Podcast | WGAN Forum Podcast WGAN-TV Podcast | How to Get Started with SIMLAB STAGES: a Deep-Dive Onboarding Training Demo | Guest: SIMLAB STAGES Product Owner Robert Czarlewski | Wednesday, 18 September 2024 | Episode: 226 | www.SIMLABinc.com and www.SIM-STAGES.com @Jedrzej @SimlabSales @SIMLAB WGAN Forum Podcast | How to Get Started with SIMLAB STAGES: a Deep-Dive Onboarding Training Demo | Guest: SIMLAB STAGES Product Owner Robert Czarlewski | Wednesday, 18 September 2024 | Episode: 226 | www.SIMLABinc.com and www.SIM-STAGES.com @Jedrzej @SimlabSales @SIMLAB WGAN-TV eBook | How to Get Started with SIMLAB STAGES: a Deep-Dive Onboarding Training Demo | Guest: SIMLAB STAGES Product Owner Robert Czarlewski | Wednesday, 18 September 2024 | Episode: 226 | www.SIMLABinc.com and www.SIM-STAGES.com @Jedrzej @SimlabSales @SIMLAB  WGAN-TV Training U WGAN-TV Training Academy | How to Get Started with SIMLAB STAGES: a Deep-Dive Onboarding Training Demo | Guest: SIMLAB STAGES Product Owner Robert Czarlewski | Wednesday, 18 September 2024 | Episode: 226 | www.SIMLABinc.com and www.SIM-STAGES.com @Jedrzej @SimlabSales @SIMLAB WGAN-TV YouTube Channel | How to Get Started with SIMLAB STAGES: a Deep-Dive Onboarding Training Demo | Guest: SIMLAB STAGES Product Owner Robert Czarlewski | Wednesday, 18 September 2024 | Episode: 226 | www.SIMLABinc.com and www.SIM-STAGES.com @Jedrzej @SimlabSales @SIMLAB WGAN-TV | How to Get Started with SIMLAB STAGES: a Deep-Dive Onboarding Training Demo | Guest: SIMLAB STAGES Product Owner Robert Czarlewski | Wednesday, 18 September 2024 | Episode: 226 | www.SIMLABinc.com and www.SIM-STAGES.com @Jedrzej @SimlabSales @SIMLAB Video: SIMLAB STAGES | www.SIM-STAGES.com  www.SIMLABinc.com | www.SIM-STAGES.com WGAN-TV eBook | How to Get Started with SIMLAB STAGES: a Deep-Dive Onboarding Training Demo ======================================================================= Special Time: 11 am ET (5 pm in Poland) on Wednesday, 18 September 2024 on WGAN-TV ======================================================================= Hi All, [WGAN-TV eBook (above) ... WGAN-TV Podcast (above) ... WGAN-TV Transcript (below)] -- Are you thinking about adding STAGES by SIMLAB to your Matterport digital twins? -- Do you have a client in the AEC space that uses Matterport that wants to add STAGES? -- Would you like a deep-dive onboarding demo of Matterport + STAGES by SIMLAB? Stay tuned! On WGAN-TV Live at 5 (special time: 11 am ET and 5 pm in Poland) on Wednesday, 18 September 2024 my guest will be SIMLAB STAGES Product Owner Robert Czarlewski. Topic WGAN-TV | How to Get Started with SIMLAB STAGES: a Deep-Dive Onboarding Training Demo Highlights We will assume that you are already a pro with Matterport and that you have watched previous WGAN-TV Live at 5 shows about SIMLAB STAGES (www.WGAN.info/SIMLABonWGAN). Robert will show us examples of Matterport digital twin powered by SIMLAB STAGES and then show us the backend of how these SIMLAB STAGES features are added to a Matterport digital twin. Robert will show us 7 Basic Features of SIMLAB STAGES: ✓ Feature 1: Creating an Organization "The first step when using Stages is to create an organization. The organization serves as your workspace, where all your projects are stored, and licenses are tied to the organization. Therefore, it’s a crucial part of the environment setup." ✓ Feature 2: Creating a Project "After setting up the organization, the next step is creating a project. Each project can include various components, such as scans, notes, and other materials. I’ll show you how to create a new project step by step." ✓ Feature 3: Adding Components (Matterport Scans) to a Project "Once the project is created, the next step is adding components, such as scans. This is a fundamental part of building a project in Stages, so it’s essential to know how to do it correctly." ✓ Feature 4: Matterport Scan Synchronization "Scan synchronization is a critical process. In this step, it’s important to define the synchronization points in locations that are as far apart as possible and, if possible, at different heights. The first scan should be manually marked as synchronized, creating what we call a 'reference scan.' You can verify the synchronization quality using the split screen tool, and if necessary, remove and repeat the synchronization." ✓ Feature 5: Adding Notes "You can add notes to each project, which allows for better documentation and team collaboration. Now, I’ll show you how to do that." ✓ Feature 6: Attaching Materials to Notes "You can enhance your notes by attaching additional materials, such as images or files. This is a very useful feature that provides more information in your notes." ✓ Feature 7: Sharing Projects "Lastly, we’ll cover how to share projects. You can invite other users to collaborate, assign them roles, and manage access. I’ll show you how to send invitations and manage roles within the project." Robert will also show additional features and tips and tricks: ✓ Feature 8: Generating Reports "In Stages, you can generate detailed reports from each project. It’s a quick and easy way to present the results of your work." ✓ Feature 9: Generating Public Links "If you need to share a project with external stakeholders, you can generate a public link. This is especially useful when you need to quickly share your project." ✓ Feature 10: System Preferences "Lastly, I’ll show you how to customize the system preferences. You can change the appearance of the timeline, switch between light and dark themes, adjust the units of measurement, and modify the date format." Questions? What questions should I ask Robert during the show? Best, Dan  www.SIMLABinc.com | www.SIM-STAGES.com |
||
| Post 1 • IP flag post | ||
|
WGAN Forum Founder & WGAN-TV Podcast Host Atlanta, Georgia |
DanSmigrod private msg quote post Address this user | |
| WGAN-TV | How to Get Started with SIMLAB STAGES: a Deep-Dive Onboarding Training Demo | Guest: SIMLAB STAGES Product Owner Robert Czarlewski | Wednesday, 18 September 2024 | Episode: 226 | www.SIMLABinc.com and www.SIM-STAGES.com @Jedrzej @SimlabSales @SIMLAB Transcript (video above) – Are you thinking about adding STAGES by SIMLAB to your Matterport digital twins? – Do you have a client in the AEC space that uses Matterport that wants to add STAGES? – Would you like a deep dive onboarding demo of Matterport plus STAGES by SIMLAB? Stay tuned. Hi you all. I'm Dan Smigrod, Founder of the [www.WeGetAroundNetworkForum.com]. Today is Wednesday, September 18th, 2024. You're watching WGAN-TV Live at 5: a podcast for digital twin creators shaping the future of real estate today. We have an awesome show for you: How to Get Started with SIMLAB STAGES - a Deep-Dive Onboarding Training Demo. Our subject matter expert is SIMLAB STAGES Product Owner Robert Czarlewski. Robert, thanks for being on the show. - Hi Dan, thank you so much for having me on the show. It's a real pleasure to be here. I'm grateful for the opportunity to join today. - Thank you, Robert. For today's show, we will assume that our Viewers are already a pro with Matterport and have watched previous WGAN-TV Podcast shows about SIMLAB STAGES. Those are viewable at www.WGAN.info/SIMLABonWGAN Robert, by the end of today's show, what are the highlights of what we will have learned about how to do Matterport plus STAGES by SIMLAB? - Yeah, well the goal of today's session is to familiarize you with the key functionalities of the STAGES, which will help you with your daily work and improve Project management efficiency. And if I may, a few words about the agenda prepared by me. So first of all, a brief presentation of the existing Project to show you how the complete setup looks like in STAGES. Then a detailed walkthrough on the Basic functionalities and hear a few words about it. I would like to tell you about a completed Project. Then creating an Organization, creating a Project, Adding Components, Scan Synchronization, then adding the Notes, attaching material to Notes, which is also very important. sharing your Projects, and at the end, some additional features and tips. So that's what I would like to tell you about during this session. - That's great. Can you show us a finished example of a Matterport tour powered by SIMLAB STAGES, so we kind of know where we're headed in today's training? - Sure, of course. Let me share my screen and... - Great. And while Robert is sharing his screen, a couple of websites: www.SIMLABinc.com is the home website. You can also go to the SIMLAB STAGES microsite: www.SIM-STAGES.com And again to see previous episodes of WGAN-TV Podcast, it's: www.WGAN.info/SIMLABonWGAN Great, I'm looking at your screen. - Great, so as you can see, I'm displaying at this moment the web version of STAGES, because as you probably know, in SIMLAB we are developing two versions, web and desktop. And during today's session, I would like to focus on the web version of the STAGES. I will mention the differences between those two versions a bit later, but right now using the web version, I would like to show you a Project that is ready. And I will use the Project showing our office here in Poland. So after clicking on the title on the Dashboard system takes you directly to the Project. So you can see the list of the STAGES with the dates of the creation with the simple filters and some additional features. But the most important parts are placed here in this view, because we have three tabs: STAGE Info, Notes and Matterport. So if I click the Matterport, which is probably the most interesting for you, you will see the Matterport scans of our office here. So that's how it works. We can move through it. And in this view, I mean on the top of the Matterport scan we placed the three most important features: the Time-Line, which is available here. So using the Time-Line we can easily jump between STAGES and see the differences between them. Then we have a Compare View button which allows the User to easily compare the differences between STAGES in one view, and the last, but not least, our Issue Manager or our tool for Communication with the rest of the Users involved in Project, I mean the annotations. So this is the Project that is ready. As you can see, I can easily move through the scan, I can jump between the particular STAGES and that's how the completed Project looks like. The most important thing I guess is the Synchronization, which allows us to keep the same point of view when we jump between different STAGES: that's because of our Synchronization mechanism. Of course, there is a tab with the Notes, this tab lists all the Notes and Issues placed in a particular STAGE and the STAGE info contains the information about this particular STAGE. Some information short resume about the number of the Notes and Issues and the list of the components added to the particular STAGE. Dan, any questions about this part? Would you like to see some more? - Actually, it sounds great. Yes, Robert, it looks like what you showed me are three key features of SIMLAB STAGES. First, the Time-Line feature, second, a Split Screen: compare Matterport at one point of time to Matterport shot at a different point of time. Three, was the Communications features and then I think as an added bonus, you showed Notes. So I'm expecting that by the end of today's training I'll know how to create all that on the SIMLAB STAGES backend. - Exactly, exactly. That's the goal of our training today. Okay, so as I understand we can move forward and start working with our Project. Let me log out from this session and I will start with a quite new and fresh account. Okay, so this is a new account. It's totally empty. As you can see, there are no Organizations, there are no Projects. And the first thing we have to do to start working with STAGES, with your scans and the rest of the materials, you have to create an Organization. And this is a very important step, because of two reasons. First of all, Organization is a kind of workspace. When you will place your Projects, your all detailed information. So without Organization, you will not be able to do anything in STAGES. The second thing is that if someone decides to buy a SIMLAB STAGES subscription plan that this User has to remember, that the subscription plan is by Organization. So that's why creating an Organization is very important and in most cases it's required to work with STAGES by SIMLAB. Creating an Organization is quite simple, because you can do this in two ways. We can click a button: Add Project and then we get the information that first we have to create an Organization, then we go to the Organization button or we can also go to Organizations Menu and here click the button: Add Organization. Let's name it: test.org - Robert, would it be helpful to think about an Organization if I'm using SIMLAB STAGES, because I own many different buildings, am I thinking about whether this is building 1 as an Organization or not. - No. - I'm thinking about it, this is my company and I'll be inviting people to my Organization to view our Projects. - You should consider the Organization in STAGES, like your company, because in Organization you can put a lot of Projects. So you are creating an Organization as a kind of container for your Projects. - Okay, I'm clear on that. - As you saw, I just created an Organization named test.org and then you can equip this Organization with some additional information. With the description, you can add the picture for it and here is the Menu with some additional items, Users, Organization Roles, Teams and so on. But to create a Project, an Organization must be set up. We just did it. So we can go to the next step, which is creating a Project. So I'm getting back to the Projects Menu, then I can click on the button: Add Project. Now I have to choose the Organization which will carry the Project from the selector and we have another window with the forms to create a Project. So I will put the name of the Project right now. Okay, there is a field for a Description of the Project. We can add a picture for it for easier recognition and then we can also put the address for the location. This is the part integrated with Google Maps. So I can do something like this, for example, Confirm, and our Project is created, but the Project is empty at this moment. To add the content to the Project, we have to add the STAGES and add the scans to it. So the next step, I'm getting back once more maybe, we have to click the Tile on our Dashboard, to open the Project and then we can add the STAGES. Adding STAGES is also very simple, because all you have to do is to click on the button Add STAGE, then put the name of the STAGE that it may be maybe something else. Phase 1, we have to choose the proper date. This date is important, because in most cases this is the date of the scanning session of the space. - So if I'm doing construction progress, I might have a STAGE is week 1, a STAGE is week 2, a STAGE is week 3, and I would put the actual dates. - Exactly. - There might also be a BIM model, for example, and we assign that to a date. So it's essentially, I could think of STAGES as being when I scan or when that BIM model is available or when that floor plan was last done. - That's right, that's right, there is no one single rule, how often do the scans, because it depends on the situation. You can do this once a week, once a month. There is no one recipe if I can say this for such a situation. But yes, every STAGE is some kind of Phase of the Project. So I just add the one STAGE, then I will add the next one. So we just create these STAGES in our Project. But those STAGES- - Well, I'm confused there. It looks like the dates are kind of backwards there. I would think of February or maybe I have the dates backwards. I think that that's February 9th or is that September 2nd? Help me out, because I think it- - September 2nd. It's a European date format. - Ah, okay. So for clarification for our U.S. audience, Phase 2 is actually 09 is September, 02 is the second date. So Phase 2 is actually September 2nd, 2024. Phase 1 is July 3rd, 2024. - Exactly. - The dates are handled a little bit differently in Europe than they are in the United States. - Now we have to equip our STAGES with Matterport scans. To do this, we have to go to the Menu Add Component here and as you can see, we can add Matterport scans to this particular STAGE. I have to open my Note and copy the link for this, for the Matterport scan. So we can choose if you would like to use public or private scan, then we have to put the name for this component, STAGE 1, for example. And in the last field we have to put the link to this scan. Great, and one small remark. During this process and during all the work with the scans, we are not downloading the scans to our solution. As you can see, we're only linking it. So the scans are kept safe in the Matterport Cloud, we are just taking the link and putting it into our solution. In the same way, I will put the component in a Phase 2 STAGE. So I will copy the hyperlink. - I see there's a gap there in the URL. - Yeah. I have to go back to this in the document and copy this. Just give me a second. - Oh, there is a gap on that copy and paste there. - Yeah. Okay, so the second component to our STAGE 2 is added. So we have an Organization, we have a Project, we have a STAGE in the Project and in every STAGE we have added Matterport scans. And now a very important step, because to get the effect of the Synchronization, I mean to get the Time-Line and the Compare View, we have to synchronize the scans one to another. But in the first step we have to choose our Reference Matterport scan. This one, this scan will be the Reference for the rest of the Matterport scans. And to do this, we have to mark this Matterport scan as Synchronized manually. To do this, we have to go to the Menu under three dots here next to the component and choose Set as Synchronized. As you can see the label of the components change to green and there is information on the synced. And that means that we can go to the Matterport tab and see what the component looks like. Yep, that's our first Matterport scan on our first STAGE. Great. Now we can go to the next STAGE and Synchronize this scan with the previous one. To do this, you have to go to the Menu under the three dots and choose the option Synchronize. The process of Synchronization is quite easy in fact, because all you have to do is to pick up three specific points on the Matterport scan, which is not Synchronized, mark them, and then repeat the process on the scan, which is already synced. So I will do this at this moment, okay? Okay. There's one point, second, and the last one we will place here. So we mark three specific points on the Matterport scan, which is currently not Synchronized. Now we have to choose the scan of our Reference scan to proceed with the Synchronization. So I have to click the Next Step button and choose the Matterport scan, the STAGE which is already Synchronized. We have to accept this component for Synchronization and repeat the process with marking the specific points on the Matterport scan. So the first one was here, the second one's here and the last was here. Now we have to accept the Sync. And as you can see, the second STAGE is already labeled Synced. So both of them are Synchronized. The best way to check if the Synchronization is okay is to use the Split Screen or the Compare View option. So I will go to the Matterport tab and from here I will start our Compare View tool. Everything seems to be okay with the Synchronization. We can go through the Matterport scan and on both panos we see the same area of our object. So everything's okay with the Synchronization. - Robert, would a best practice be to try and have Matterport scan points be in the same identical location over time or it's not necessary? If you can, it's great, but it's not necessary. - No, no, it's not necessary. The best advice I can give you is to place the specific points for Synchronization mechanisms, so far away as is possible. That's why I placed it on a different end of our building. The farthest away the better. - For clarification. Yeah, for clarification for the Synchronization, in order to do this side-by-side Split Screen view, I'll have the most success of picking three locations in Phase 1 and that are as far apart as possible. And then selecting those identical locations in the next Phase or the next Matterport scan, in order to have this, the side-by-side Split Screen view be as best as possible. - Exactly. - Okay. - Exactly. - I'm clear on that. That's great. - Great. So our Matterport scans are Synchronized, Organization is created and Project and so on. So I think we can go to the next feature. I would like to tell you, I mean, adding the Notes. To add the Notes or Issues or any other information, we have to click the + button here at the bottom of the screen and the Notes form will open. And here we have some fields to put some additional information. But first of all, I would like to show you how to place the marker of the Note in the X, Y, Z space. To do this, we have to go to the Menu under three dots here, click the, Assign a New Location in place of the marker of our Notes when you want it to be, okay? Now we can change the title of the Note. For example, electrical. Oh, sorry. So let it be like this. Then we have to choose if it'll be Information or Issue. In case of Issue, we can also set up a Status for this Issue. It can be Pending, In Progress, Resolved or Unresolved. Let it be in Progress. The next selector is a Stakeholder. Stakeholder is a very important part, because we understand the Stakeholder for the Note as a person which will be responsible for fixing the problem, for providing required information in general for taking care of the Issue, right? Okay, I have to repeat the process, because I clicked the Cancel button. Yeah, that will be okay. So as the Stakeholder. I can drop down the selector and choose someone from the Users which are involved in the Project. There is a field for a Description of the Note. So for example, please place a socket here. Confirm. And when we can also add some media, some attachments to our Note to make them more understandable. So if I click the Add Attachment here, you will see that I can add a picture from the hard disk of my computer, I can add a video, I can add different docs. Let's do this, I will add a picture. Every added picture to the Note will be displayed in the Photo tab, but also I can add documents, for example, operation manual or something like this. So I can also add it here. And these documents will appear here in the Docs Tab. And it can be downloaded or, of course, can be deleted. Also, we can add an audio file from our hard disk. We can record audio for example. "Hey guys, please fix this problem, the customer will visit us tomorrow, everything must be working." Now I can add the title, save it, and the voice memo is placed here in the Audio tab. The last position on the list of the attachments is the screenshot. And this is quite interesting in my opinion, because I can take a screenshot of the view on the screen, but also, I can take a screenshot and draw on it. So I can additionally leave some information on the screenshot. With this slider, I can choose the thickness of the line. I can pick up the color for the drawing. I can do something like this, for example, I would like to be placed over here. If I click the Save button, the screenshot with my manual annotations will be placed in a Photo tab. Last field in the Note form is a comment. So I can leave the information here for example, "already done" and my comment appears here at the bottom. I would like to tell you a few more details about the Note, because this is one of the most important tools in our solution and why we call the Notes as a feature for Communication. In this Menu under three dots, there are a few options like Assigning Location, Changing Title. We can transfer Note between STAGES, we can delete Note or copy the URL Note to send via email for example. But also, we can turn on Email Notifications. If we turn on this option, the small icon on the envelope we'll appear here. That means that for this particular Note, Email Notification will be sent to the Stakeholder and to me as an Author of the Note. Every change in this particular Note will be confirmed with the Email Notification. So that's the way of the Communication tool using Notes and they are built-in mechanisms of the Notifications. Okay, let's add some more Notes for example here. - Well, I think this feature is placed-based Communications. So we're talking about a particular location -- at a particular point in time -- to facilitate Communications on perhaps something that needs to be changed, fixed, Noted by the Stakeholder within this particular Project. - That's right. - So the Stakeholders might be the architect, the construction manager, construction foreman, the safety manager, whoever is involved in this Project, it's a way to have a conversation within the Matterport tour using SIMLAB STAGES as an overlay to the Matterport. - Yep, that's right. Okay, so we prepared some Notes in our Project, in our STAGE. Those Notes are listed here in the Notes tab. As you can see, the Notes tab is equipped with the Search tool, so I can search via phrase for example. Great. And what is also important, the Notes tab displayed the Note's name outdoor date of the modification. But on the end of the line with the Note information is a small icon of the navigation. If I click this icon, the system takes me directly to this Note placed in the X, Y, Z space. That's how it works. Okay, so we have a Project inside the Organization, we have a Project equipped with the STAGES. STAGES are equipped with the Matterport scans. We put some Notes in the Matterport scans and the Split Screen tool shows us the difference between different STAGES and also we can use the Time-Line, because the process of Synchronization is okay. So that's how it works, the most important tools in STAGES by SIMLAB. Dan, do you have any questions about this part? - On the location of a Note, so I could imagine in a Project there could be dozens, hundreds, or even thousands of Notes. So this is a way to find your, let's say, you want to see all the Issues that are related to the Author, in this case you, Robert, but that may have been the safety manager. Show me everything on the safety manager, show me everything regarding electrical, show me everything regarding plumbing, show me everything regarding mechanical. So what I'm seeing is a very robust platform for Communication that lets me quickly locate the Issues that are important to me. And frankly, it might be I'm considered the Stakeholder and therefore those are the ones I really want to pay attention to. And as I quickly locate where that particular Issue is in the building, I can deal with that Issue and then write a Note back to say that I've completed, I've moved the electric socket, or I've placed the electric socket or I've removed something. So far, what I've seen you show is how to set up an Organization, how to set up a Project, how to set up a Time-Line, how to annotate a space, how to look at a Matterport tour in a Split Screen view in order, to perhaps, compare construction progress from week 1 to week 3. - Exactly. And the next thing I would like to tell you about is the Sharing the Project, because we are telling all our customers and Users that there is a possibility to cooperate in one Project for different people, different groups of Users. And Sharing the Project is a functionality which is placed in the Organization tab. So here we have a Menu of Users, where I can add new Users. And what is important, I can add those new Users to my Organization, to my Project with different levels of Permissions. I will switch off to another account here, because this one is quite new without any additional licenses assigned. But for example here, if I go to the Organizations, if I add the button, I click the button, Add New User, you will see that the new form appear when I can place the email address of the person I would like to invite, then I can choose the level of the Permission for the person and at least I can choose the Project I would like to invite this particular person. And what is important in this part, if I would like to invite someone as an Admin to my Organization and to my Project, such a person will see all the Projects by default. For Admin, there are no limitations for the Project. But if I choose the Project Manager, the Basic or even Viewer, I can also choose the particular Project I would like to invite to such a person. So this is very important to remember that if I invite someone as an Admin, he will be able to see all the Projects in my Organization. The Viewer Role is quite specific, because to invite someone as a Viewer, you don't need to buy a special STAGES license for this person. The Viewer can see the Project, the Viewer can see the details of the Project, can see the content of the Notes, can use Time-Lines, Split Screen, but cannot change anything. That's why such a Role doesn't need a special SIMLAB STAGES license. You can invite as many people that you want using the Viewer Role. Sharing of the Project is also available from another level if I can say like this. I mean, and now we are touching on some additional features which are also on our list of the topics. Because if I go to the Project in the Organization's Menu and choose from the Menu under the three dots, Project Dashboard, you will see that there are three tabs: Members, Teams and the Public Links. The Public Links are a feature for easy sharing of the Project, but the receiver of the link doesn't need to create an account in STAGES, doesn't need to log in, just open the link and see what's inside. So I can copy this link right now, open the next window, put the link on the address bar and I can see the Project. And the Time-Line and Compare View are also available in a Public Link mode. But you have to know that in the Public Link we can see only the Matterport scans, we cannot see the Notes, you cannot see the content of the Note. It's just for browsing the Matterport scans of our Project. So that's how the Public Links work. And if you would like to see some additional features, I would also like to show you some non-obvious possibilities of the STAGES by SIMLAB. If I click the Login icon here, there's also a small Menu and I can choose the Personal Settings. And here in Personal Settings we can do some additional setup of our Organization in STAGES. First of all, we can choose the language we would like to use in our Organization. At this moment it can be English, Japanese, Polish, Spanish, and Deutsche . The next step is appearance. And here we can choose if you would like to use Light Mode or maybe Dark Mode. Also, we can set up the type of the Time-Line: Simplified and Detailed. In the next step we can set up the units. I mean we can use the Metric system or Imperial. And at the end of the options is a Calendar Format, where you can choose the European and American date format. I will switch to the Light Mode one. Okay, so those are the most important features of STAGES by SIMLAB. The most crucial features, if I can say like this. Without those steps, you cannot use STAGES in a normal way, if I can say. - Oh, so just to confirm, what you've shown us so far are the Basic features of SIMLAB STAGES. You showed us how to create an Organization; how to create a Project; how to add Components, such as a Matterport scan to a Project ; you showed us Matterport Scan Synchronization; how to add Notes; how to attach material to Notes such as a photo, a video, a screenshot; annotate a screenshot and video. And then you also showed us how to share Projects. I think that the next things you were going to show us, Robert, were some additional features, some tips and tricks including Generating Reports; generating Public Links and System Preferences. - Yes, I already told you about the Public Link, but I will show it once again. So we have to go to the Organizations tab, choose our Organization, and go to the Projects. And for an interesting Project we can choose the Project Dashboard. And here is a tab with the Public Link. Creating a Public Link is quite easy, because all you have to do is click the button, New Link, set the name, then you can choose if the link should be always active or maybe active until a specific date. Let it be active. And at the last position you can choose the type of the Time-Line which will be displayed on the Public Link. So if I click the Generate Link, okay, it generates that. Now I can copy this link and open it in a new window. - And Robert, how is that Public Link different from inviting someone as a Viewer? What would be the different scenarios you would use? Generate Public Link or invite as a Viewer? - The main difference between Public Link and inviting someone as a Viewer is that in the Public Link mode you cannot see the Notes, you cannot see the Notes, you cannot see the details of the Project, cannot see the details of the Organization. You can just browse the Matterport scans placed on the particular STAGES and use our tools: Time-Line and Compare View. The Viewer Role allows the User to see more details so they can click on the Note icon and see all the content placed in the Note. That's the main difference. What is also interesting, a Public Link can be used as a kind of marketing material, because you can put the Public Link in something called the iFrame and place it in your website, so we can show results of your work for all interested people via your website. That's the main differences and usage, if I can say like this for the Public Link. - Okay. - Cool. - I'm clear on that. - This was the Public Link, but also I would like to tell you about the Generating Report, which is related to the Notes. To generate a Report, we are still operating in the Organizations tab and from the same Menu at the end of the line with the Project, we can choose the option Generate Report. If I click this option, you will see that I can generate this Report under different criteria. So I can set up the date range for the Notes or I can set up the STAGES, I can use every particular STAGE to create a Report or Select All, for example. And also, I can use some additional filters. So for example, I can generate a Report only with Unresolved Status. And if I click the Generate button, the system will prepare the Report in the background, it will be prepared in a PDF file format. So you can download it, print it as a part of Project documentation or send it via email or something like this. And you can browse this Report as you can see in the Notes equipped with the pictures, those pictures also placed in the Report. There is a description, Status and so on. So this is the tool for documentation of the Project in progress. - So just for clarification on that Report, Robert, this might be generating a PDF for an electrician who is on site and maybe is used to using a clipboard with the items that need to be punch list that needs to be fixed. And so, this essentially is creating that printout clip to be used on a clipboard and it goes perhaps the next step in that it has the Notes that have been generated on that particular clipboard item, move the electrical socket from here to here. - Exactly, exactly. That's the purpose if I can say like this of the- - Privileges. Yeah, so I noticed on that Report there were some different options. There was: Status Completed; Status Uncompleted. Could you take us back to Notes and show us perhaps where the electrician might have had been assigned to an item and as the Stakeholder and it was Pending or Unresolved and where they changed the Status? - Sure. Okay, so here is a list of the Notes. If I click this Navigation icon, the system takes me to this Note placed in the X, Y, Z space in our Matterport scan. And here in this window we can set up or change the current Status of the Note. We can also change the Stakeholder of the Note, place some comment at the end of the form. Those comments are displayed at the bottom here, and we can change some more things, because I can replace the localization of the Note using the Menu. I can turn on or off Email Notifications for the Note using this Menu, but which can be also helpful in some situations, we can Transfer Note between STAGES. So for example, at the very beginning of our Project, I may prepare the empty STAGE without scans, place some crucial Notes, crucial information in the form of the Notes. And then when the next STAGES will appear in the Project, I can move the Notes to the future STAGE. And I can do this in the two options. I can choose the STAGE, of course, to move the Note and I can move this Note with keeping the localization in the space or skip it and just move the Note to another STAGE. - So super-powerful that you can keep the Note in the exact position at a different point in time. So that's cool. Regarding Status, help me understand who can change Status regarding the different levels of Permissions? - I will show you the different levels of Permissions, all different Roles which are available in our solution. So first of all we have an Admin. And Admin is a really powerful permission level, because he can do almost anything in the Organization, in the Project. The higher level is only for the Owner of the Organization who is able to delete the Organization. The rest of the possibilities are the same as in the Admin Role. - So I understand Admin and I understand Viewer, Viewer can't touch anything, but can see everything. - That's right. - Help me understand Basic and Project Manager. - Project Manager is almost the same Role, like the Admin, but limited to a particular Project. - Ah, okay. So the Admin may be able to see 10 different Projects. The Project Manager assigned to a specific Project kind of has Admin Role, but it's limited to that particular Project. - Exactly, exactly what we said. - And so then how would Basic compare to Viewer? - Basic can do some things in the Project, but the level of the Permissions in the Basic Role can be changed. So for example, in default setup, Basic can create a Note, can change the Status of his Note, he can delete his own Note, but he cannot change anything in the Notes for the rest of the Users. In a default setup, Basic cannot change the Synchronization. So this is the quite Basic User which can add some annotations, add the materials to the Notes, change the Status of their own Notes, but cannot touch anyone else, materials or Notes and cannot change the Synchronization of the scans, cannot change the name of the STAGES or Project or Organization. So this is the Basic User, but the Basic User is a very interesting Role, because we can change the level of the Permissions for the Basic User per every Project. So for example, in one Project the Basic User cannot change the Synchronization. But some other Project can be set so he can do it. - So this sounds like there's yet another Dashboard you haven't shown us where you get to set what for example, a Basic person can do. If I'm hearing you correctly, is there yet another Dashboard for setting system Preferences that you want to show us? - You can do this by the level of the particular Project. So if I go to the Project Menu, open the Dashboard of the Project. - You want to do that right now? I have you, I just see a side by side, so I don't see screen share. Did you want to share your screen again and perhaps- - I'm still sharing. - Let's see. - I can stop it and start it once again. - Yeah, that would be great. - About now? - Yes. So I think what I'd like to see is a screen for system Preferences where you can show us how the Roles of an individual can be assigned within a Project. - Okay, so once again, here is a view with the Project list, our Dashboard, and if I go to the Organization Menu, I can do some more with the particular Organizations and Projects depending on my Permissions. In this particular case, the Organization, SIMLAB, I can take a look at the Users which are involved in this Organization. Also, I can create Teams, I can create Teams templates, I can take a look at the Description of the Roles, I mean the Basic, Admin and Project and so on. Also there is a Projects Menu here and I can go to the Project Dashboard and see some more details, some more Organization details of this Project. So I have a list of the Members, I have the list of the Public Links and their Teams and for the User, I can set up the privileges for this particular Project. So we are talking only -- - Yeah, this is the screen that I was looking for where it's a very granular- - Exactly. - I could imagine there's a Default Setting, but if I want to override the Default, this is the screen to do that. - Yeah, that's right, that's right. So I can set up almost every Action in the system for Basic Users on the Project Level. - Does this also apply at the Organization Level? - No, it's only for the Project Level. - Okay. So for a particular Project- - For the Organization Level- - Yeah, so for a particular Project, if you want to turn on and off the ability to change the Status of a Note, that can be done in that Teams template. - For example, the Teams template is more for the bigger groups of Users with the same level of the Privileges. But if I would like to change something for the one single User in my Project, I can do this from the Project Level and change this Level of Permissions using those Menu I just showed you. - Okay, awesome. So that would be... You noticed, let's see, could I trouble you to take it off the screen share? - Sure. - So you noticed, for example, I'm the electrician in the field and I keep changing the Status to Completed, Completed, and go, no, it's not Completed. I don't want to let them do that. I want them to send me a Note that says it's completed and as the Project Manager, I'm going to change that item to say it's Completed. - Yes, it's possible. - Okay. You covered a lot today, before we say bye, is there anything else that you want to show or tell us on how to get started with SIMLAB STAGES? - I think that I will show you the most important steps and features in our SIMLAB STAGES solution. We learn how to create an Organization; set up a Project; add Matterport Scans; Synchronized Scans; also adding the Notes. And we touched some additional information and the additional setup of the Organization. So that should be enough to start the adventure with STAGES. - Yeah, I feel like that by the end of this training that you've taken us through that I feel like I have the confidence -- I can go to either the SIMLAB website: www.SIMLABinc.com or specifically the SIMLAB STAGES micro-site: www.SIM-STAGES.com and set up an account and begin using SIMLAB STAGES with confidence. The only other question -- my last question on this is: we've been showing the STAGES as being Matterport, but you could also add the BIM model; you could also add a floor plan. Is there anything different about how you would sync a BIM model to a Matterport tour or no, it's the same thing, go find three common points within the BIM model. go find three common points within the Matterport tour. Boom, you're synced. - In general, the way of Synchronization different types of the components. I mean the MatterPaks, for example, IFCs, floor plans and the other ones are totally the same. We have to set up three specific points, mark them on the component unsynchronized, and then repeat them on the component, which is already synced as a reference component. So this way of Synchronization for different components is the same. The main difference is in the version of the STAGES, because like I said at the beginning of the WGAN-TV Podcast, we are developing STAGES into web and desktop. The main difference between web and desktop is that in the web we can handle only Matterport scans, in the desktop you can use much more; five formats as a components of the STAGES, like I said: Matterport MatterPak, BIM, CAD , PDF, SVG, and the point clouds in the X, Y, Z and E57 file format. Those file formats are handled by our desktop version of SIMLAB STAGES. - And I could imagine that there's a mobile version, so that if I'm in the field and I want to take pictures and annotate, I can do that. - You can use it on your mobile devices. And what is also important, the desktop version can be used on the Windows and Mac OS machines and the web version can be used on the different mobile devices on the Android and iOS system, there's no problem. - So if I'm in the field, let's say I am the electrician, I did move that electrical socket from here to there as was requested as an open Pending Issue, I could take a picture showing that the work has been done and then annotate the conversation for that place, that point in that space. - Yes, it's possible. - Awesome. Robert, thanks for being on the show today. - Thank you very much. - We've been visiting with SIMLAB STAGES Product Owner Robert Czarlewski. For Robert, I'm Dan Smigrod, Founder of the We Get Around Network Forum and you've been watching WGAN-TV Live at 5. |
||
| Post 2 • IP flag post | ||
Pages:
1This topic is archived. Start new topic?