


Transcript: Intro to Matterport Workshop Post-production for 1st-time Users19214
Pages:
1
 WGAN Forum WGAN ForumFounder & WGAN-TV Podcast Host Atlanta, Georgia |
DanSmigrod private msg quote post Address this user | |
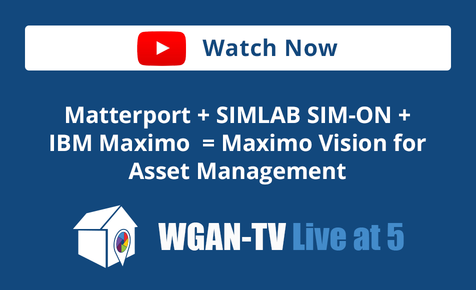
WGAN-TV | Intro to Matterport Workshop Post-production for First-time Matterport Pro2 and Pro3 Users | Guest: Scan Your Space (a Division of Sparks Media Group) Founder and CEO Tom Sparks | Thursday, 2 November 2023 | Episode: 206 www.ScanYourSpace.com | www.SparksMediaGroup.com | @ScanYourSpace  WGAN-TV Podcast | WGAN Forum Podcast 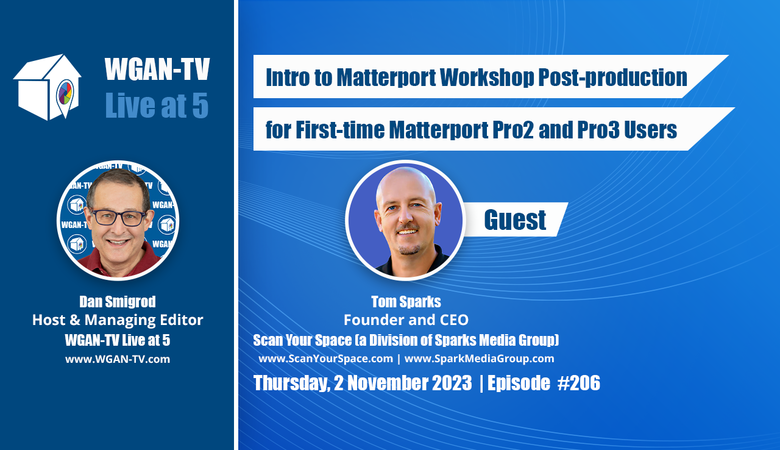 WGAN-TV Podcast | Intro to Matterport Workshop Post-production for First-time Matterport Pro2 and Pro3 Users | Guest: Scan Your Space (a Division of Sparks Media Group) Founder and CEO Tom Sparks | Thursday, 2 November 2023 | Episode: 206 www.ScanYourSpace.com | www.SparksMediaGroup.com | @ScanYourSpace WGAN-TV Podcast | Intro to Matterport Workshop Post-production for First-time Matterport Pro2 and Pro3 Users | Guest: Scan Your Space (a Division of Sparks Media Group) Founder and CEO Tom Sparks | Thursday, 2 November 2023 | Episode: 206 www.ScanYourSpace.com | www.SparksMediaGroup.com | @ScanYourSpace WGAN Forum Podcast | Intro to Matterport Workshop Post-production for First-time Matterport Pro2 and Pro3 Users | Guest: Scan Your Space (a Division of Sparks Media Group) Founder and CEO Tom Sparks | Thursday, 2 November 2023 | Episode: 206 www.ScanYourSpace.com | www.SparksMediaGroup.com | @ScanYourSpace WGAN-TV eBook | Intro to Matterport Workshop Post-production for First-time Matterport Pro2 and Pro3 Users | Guest: Scan Your Space (a Division of Sparks Media Group) Founder and CEO Tom Sparks | Thursday, 2 November 2023 | Episode: 206 www.ScanYourSpace.com | www.SparksMediaGroup.com | @ScanYourSpace  WGAN-TV Training U in Matterport WGAN-TV Training U in Matterport | Intro to Matterport Workshop Post-production for First-time Matterport Pro2 and Pro3 Users | Guest: Scan Your Space (a Division of Sparks Media Group) Founder and CEO Tom Sparks | Thursday, 2 November 2023 | Episode: 206 www.ScanYourSpace.com | www.SparksMediaGroup.com | @ScanYourSpace WGAN-TV | Intro to Matterport Workshop Post-production for First-time Matterport Pro2 and Pro3 Users | Guest: Scan Your Space (a Division of Sparks Media Group) Founder and CEO Tom Sparks | Thursday, 2 November 2023 | Episode: 206 www.ScanYourSpace.com | www.SparksMediaGroup.com | @ScanYourSpace WGAN-TV | Intro to Matterport Workshop Post-production for First-time Matterport Pro2 and Pro3 Users | Guest: Scan Your Space (a Division of Sparks Media Group) Founder and CEO Tom Sparks | Thursday, 2 November 2023 | Episode: 206 www.ScanYourSpace.com | www.SparksMediaGroup.com | @ScanYourSpace Below are the "before" and "after" editing in Matterport Workshop examples that Tom Sparks @ScanYourSpace shared on WGAN-TV Live at 5 show on Thursday, 2 November 2023). "Before" Editing Demo Tour | Matterport tour courtesy of Scan Your Space[/b] (a Division of Sparks Media Group) Founder and CEO Tom Sparks | www.ScanYourSpace.com | www.SparksMediaGroup.com | @ScanYourSpace "After" Editing Demo Tour | Matterport tour courtesy of Scan Your Space[/b] (a Division of Sparks Media Group) Founder and CEO Tom Sparks | www.ScanYourSpace.com | www.SparksMediaGroup.com | @ScanYourSpace  WGAN.info/Pro3course WGAN-TV Training U in Matterport WGAN-TV Transcript | Intro to Matterport Workshop Post-production for First-time Matterport Pro2 and Pro3 Users Hi All, (Transcript below...) -- Before you buy a Matterport Pro2 or Pro3 Camera, do you want to see the post-production workflow for a Matterport tour? -- Are you ready to use Matterport Workshop for the first time and would like to see a deep-dive demo? Stay tuned … On WGAN-TV Live at 5 (5 pm ET) on Thursday, 2 November 2023, our training show: WGAN-TV | Intro to Matterport Workshop Post-production for First-time Matterport Pro2 and Pro3 Users Our Subject Matter Expert is Scan Your Space (a Division of Sparks Media Group) Founder and CEO Tom Sparks @ScanYourSpace By the end of this Matterport Workshop Training show, you will know how to publish a branded pubic Matterport virtual tour that has a Highlight Reel and sharing link. Specifically: 1. How to set the starting point of the Matterport tour 2. How to add Matterport labels 3. How to add Matterport MatterTags 4. How to create a Matterport Highlight Reel 5. How to add Matterport Notes 6. How to take snapshots in the tour so that you can download photos 7. How to download an auto-generated Matterport video 8. How to trim "spray" (top, side and top) 9. How to publish a Matterport tour (public, unlisted, password protected) 10. How to publish a Matterport tour (branded, unbranded, MLS friendly) 11. How to share a Matterport tour via social media (such as Facebook and LinkedIn) 12. How to change the details on a Matterport tour 13. How to create Matterport folders and move Matterport tours into folders 14. how to enable Matterport social sharing and VR sharing 15. How to order Matterport schematic floor plans 16. How to order a Matterport MatterPak Bundle 17. How to enable Matterport tours for Content Distribution for Real Estate 18. How to publish Matterport tours to: Redfin.com, Realtor.com and Homes.com 19. How to publish a Matterport tour to Google Street View 20. How to invite a Collaborator to a Matterport tour or folder (and a best practice tip Matterport will likely not tell you) 21. How to enable Matterport automatic face blurring and manual blur brush 22. How to enable Matterport Guided Tour Story Mode 23. How to enable Measurement mode (and to set measurements to feet/inches or metric) 24. How to enable VRBO and HomeAway 360 Virtual Tours 25. How to review space statistics 26. (and more!) Tom will first show the finished tour and then how he created it. Now, when you receive a Matterport notification that your first Matterport scan has been processed, you'll know what to do! What questions should I ask Tom during this WGAN-TV Live at 5 show? Best, Dan |
||
| Post 1 • IP flag post | ||
|
WGAN Forum Founder & WGAN-TV Podcast Host Atlanta, Georgia |
DanSmigrod private msg quote post Address this user | |
| WGAN-TV | Intro to Matterport Workshop Post-production for First-time Matterport Pro2 and Pro3 Users | Guest: Scan Your Space (a Division of Sparks Media Group) Founder and CEO Tom Sparks | Thursday, 2 November 2023 | Episode: 206 www.ScanYourSpace.com | www.SparksMediaGroup.com | @ScanYourSpace Transcript (video above) - Before you buy a Matterport Pro2 or Pro3 Camera, do you want to see the post-production workflow for a Matterport Tour? - Are you ready to use Matterport Workshop for the first time and would like to see a deep-dive demo? Stay tuned. Hi, all. I'm Dan Smigrod, Founder of the [Www.WeGetAroundNetwork Forum.com] Today is Thursday, November 2nd, 2023, and you're watching WGAN-TV Live at 5. We have an awesome show for you today: Intro to Matterport Workshop Post-Production for First-Time Matterport Pro2 and Pro3 Users. Our subject matter expert is Tom Sparks. Tom is the founder and CEO of Scan Your Space, a division of Sparks Media Group. Tom, thank you for being back on the show and to share your Matterport Workshop workflow expertise with us. - You're welcome. Thanks for having me. And hopefully, you got your check this week for the great words. - Received. ;-) Thank you. - Yeah, okay. - So before we jump into this deep-dive demo, tell us about Scan Your Space and Sparks Media Group. - Sure. So I started Sparks Media Group as a residential real estate media provider around 2018. And we've been really successful with that. We have several photographers working for us. And we're covering a whole lot of states and we're still expanding outward. And shortly after that, I saw a need for the commercial media, and that's everything from business parks to shopping centers to hospitality, restaurants, et cetera, et cetera. And so I started Scan Your Space, which caters just to that. - And your coverage area? - Well, we're covering California. We're covering parts of Nevada. We're covering parts of New Mexico, Arizona, and Idaho. - And in addition to photo, video, floor plans, aerial, what type of 3D or 360 Tours are you offering? - We primarily offer Matterport and iGUIDE. And it's about 50-50 on each of those. We offer other services, virtual sTaging, virtual decluttering, pretty much anything you can need to market a property or a business. - Cool. So how about sharing your screen and taking us into... I think what I'm going to ask for is that we look at a finished Matterport Tour so that we know where you're headed in your demo. So we'll know what a finished Tour looks like and then how you got there. - Sure. Can you see my screen okay? - I can. - Perfect. Okay. So this is the "finished cake" ... This was a Tour that I edited. And we've added pretty much everything that Matterport offers on this Tour. So do you have a preference on where we start? Or should I just- - Any and everything that you want to show us so that we know what you're going to show us, how to do that, how to incorporate that in the Tour. - Okay. So first, I guess we'll start with labels. On this floor plan view, I've added labels to each of the rooms. You'll see those here. Next, we can go to Tags, and you'll see that I have... Sorry, let me go back to the first floor. We have a couple Tags. - These are MatterTags. - MatterTags, correct. Have a couple Tags. I added a Note here. And we'll explain the Notes in a little bit. - And on your Tags, did you add anything? What kind of MatterTags did you add? - Most of them were informational. A couple of them have links, particularly to the appliances. So if you were interested in this appliance, you could click it and get information about it. And then I have one that is a media link to a video, which is right here. - Okay, so for MatterTags, Matterport MatterTags, you can add text, links, and videos. Anything else? - We have the Highlight Reel. So I'm going to hit this Play Button, and it's going to take us on a little Tour of the property. - Now I noticed during the Highlight Reel, I don't see any Thumbnails. Is that by choice? - Good question. I did not add Thumbnails. That was my choice, yeah. So... And to explain the Highlight Reel a little bit more, if you're on the Tour and you want to stop, get off the train ride, you can just click on the screen and look all around, and then you can pick up and continue the Tour where you left off. - Okay, and I see some back and forward buttons. - Correct. So you can, say you missed a spot, you want to go back and re-look at it, you can hit the back button, and go backwards. - Okay. - Yup. So that's what we're going to show how to do today. - Okay, and I also see on the right side is a sharing icon, so that icon can either appear in the Tour or not be in the Tour. So can you show us, on the back-end, how you do that as well? - I can, yeah. - Okay. And then, also, Tom, in the top left, so all that information up at the top, did you add that information on your iPad or did you add that in post? - This, I added as much as I could on the iPad, and then I kind of cleaned it up in post. - Okay, so we'll see that, too. - [Tom] Yeah. - And then even, I think if you go back to your very, maybe just refresh the screen and go back to the very first, the Splash Screen. - Okay. - So even that, is that the first image in the Tour that we're seeing as well as... So we're seeing- - Correct. Yeah. I set the Starting Location. - Okay, so we'll learn how to do the Starting Location. And is there anything else that we're going to see during work... Well, actually, there is. It's like how you share the Tour, et cetera. So maybe this is a good time for you to jump into your workflow. - Okay. - I believe you have the identical Tour without having done anything to it in order to show how each of these features was created. - Correct. Yup. - Okay, great. - So actually, we'll start with Details, since that's the easiest. And this, I did not leave out, but I'll show you the process of just adding it, changing it. This is the name that appears on the front of the Tour. And we got here just by clicking the Details tab. You can change the Presented By, so if this was an agent's name, you could put that here. If the agent had a phone number they wanted to appear, you'd put that there. Their email address. This could also be a brokerage name and you could put the agent's name here, and then their website. And then you can choose to display the full address. You can choose to display none. And I usually just keep it on the full address. - And just for clarification, for the display in the full address, that's at the very beginning Splash Screen that's right above the Play Button. - This one? No. No. That would be here. - Here, okay. - Yeah, yup. - So how did you control what was the name at the beginning on the Splash Screen? - Right here. - [Dan] Okay. - Yeah. So for this purpose, I just called it "Pro2," and then "Unedited," and that tells me that I shot it with the Pro2 and this is the unedited Tour. You can also put internal notes just for yourself. I put down here, "Pro2 Camera." - Okay. - You can put Keywords in, so Hashtags. And this says that, "It will help your public space rank well in search results," so you want to include Keywords that are descriptive. I typically don't put Keywords in for residential listings, but I will do it sometimes for the commercial spaces. We can put MLS information. I've never actually used this, so I wouldn't probably be the best to speak on it, but- - Okay. - Here, it says you can put MLS name, MLS listing ID. Down here, you can enable or disable VR sharing. So if somebody had a VR headset, they could put it on and see the space differently than looking at it on a screen or a device. - So that, the VR sharing, that was the icon that we saw in the bottom right that looked like a little Google Cardboard symbol. - Correct, right here. - That's that. So you've enabled view in VR, view in virtual reality, meaning those goggles. - Correct. - [Dan] Okay. - And then allow Social Sharing, which is that sharing button on the bottom right. I have it enabled. - Okay. Can you... Oh, that's an interesting thing and it's very subtle. You've accepted Default. And I want to say that someplace else in Settings are all the Default Settings, so that you can set up what are the Default Settings for you. Yup. - Right. So right here under Settings, you can enable a Blur Brush, which we can discuss. You can enable Notes, space searching, VR button. Interestingly enough, I think the Settings for sharing might be under the account Settings. - [Dan] Okay. - Maybe not. Hmm, okay. - Okay. If we go back to the previous page, though, I think what was interesting on the Default, if you go back to that Default page, the first Default- - Oh, yeah. - Default page we're looking for, there are other things. So if you want to enable the viewer to be able to measure, there's a measure mode that enables that. So if you really don't want people to actually look at measurements, you can disable that. So there's a lot of control- - Correct. - Over spaces. Do you have a... So actually, we're looking at your Default Settings. So it looks like you've enabled everything. - Yeah. - Do you want to discuss, while we're on this screen, automatic Face Blurring and Blur Brush? - Sure, I turn Face Blurring on. We do some commercial spaces that, for remodel purposes, where we're just getting data files, or we just want to see the condition of a space, so we don't really care about the marketing quality Tour. And so if there's people in those shots, I just always enable Face Blurring to- - So that might be you're on a construction site, the construction workers, you just want the faces blurred. Your client's not using it for marketing purposes. That said, wherever it gets shared for whatever reason, you want to blur their faces. - Correct, yup. - Okay. - And it will do faces on posters. It'll do faces on pictures. It really checks faces. - Okay. And Blur Brush? - Blur Brush is kind of a manual brush that blurs things out. And we've blurred out computer monitors. We've blurred out documents on walls, documents on desks, that sort of thing with the Blur Brush. - Any passwords on the sticky Notes on top of a computer screen? - Exactly, yup. Yup. - Before you go back to the example Tour, is there anything else on this page you wanted to talk about in particular? - No, I turned on Guided Tours. So it says, "If enabled, the newly created Guided Tour will use Story Mode presentation. If disabled, the Default presentation will remain Highlight Reel mode." So I have it on. - And do you want to explain what that means? Or do you want to show us that? - Well, we can go over it. - Okay. - Yeah, we'll go over it. - All right, so maybe back to the Tour? - Yeah. So do you want to dive into editing? - Whatever your preference, either to edit or just to let us know what those menu items are at the top, whichever order you prefer. - Okay, well, so we went over Details. If we go to Add-Ons, here's where you can order a floor plan. It's provided by Matterport. This floor plan is $14.99, and you order it here, and then they'll send you an email when it's ready. If we hit the back button... Nope, not the back button, but there. I haven't used a lot of these, I haven't used before, but I've ordered a MatterPak. We probably... It's a little too deep for today, but you can order a MatterPak. You can order an E57 data file. If you're doing a scan for insurance purposes, you can get a TruePlan for Xactimate. I have used the Google Street View publication and that's really handy. So if you click that, you can go through. It's a whole bunch of menus. But basically, you could publish this on Google Street View. We don't do it for residential listings. We do it for businesses and that's really helpful. And let's see. What else? We can order a BIM file. Matterport charges a lot for their BIM files, but somebody's gotta do the work. So if you needed a BIM file, you could order that here. And then the VRBO and HomeAway360, I haven't used that, but I'm going to assume that this is kind of similar to Street View but for these particular sites. You can click that and go through the process of publishing there. And then the Content Distribution for Real Estate, again, I haven't used that one, but it looks like you can click it and it will publish to Redfin, Realtor, and Homes.com. I usually leave that up to the agents to publish those. And what they tend to do is put it on MLS and then it syndicates to all the sites. - Anyway, so if you just go back, if you could pause there just for a second. So for the purposes of our demo today, we're really assuming that you're new to a Matterport Pro2, Pro3 Camera, maybe you're doing residential real estate, commercial real estate. So if you see some of these other terms and you're curious about them, MatterPak, E57 file, TruePlan for Xactimate, BIM file, you can go to the We Get Around Network Forum, www.WeGetAroundNetwork.com, and either search in the top search bar for one of those Keywords, and you'll see if it's in a subject of a post, or most likely, you'll be able to go over to the Tag section and search for all We Get Around Network Forum posts that discuss MatterPak, or E57 file, or TruePlan, or BIM file. So that's not going to be part of today's show of demoing those features, but just so you know. And then also, on schematic floor plans, even TruePlan for Xactimate, BIM file, there are third-party companies that also offer these solutions. So again, you can find those in the We Get Around Network Forum. If you go right up to the top, there's a tab that says, MarketPlace, and you'll find other providers. So personally, I'd probably suggest getting started with Matterport floor plans. It's easy and it's basic. But then you may find you decide that you want color floor plans or your space is bigger than what Matterport will do, or you have some very specific requirements, and there are third-party companies that will do that. Thanks, Tom. - Yeah. - Off to media. - So this is Matterport's kind of -- "we've done some work for you" offering. And they'll include a couple little video files that they extrapolate from the Tour, as well as some photos that they've extracted. And this is something I'd never use. We don't provide media from the Tour to the client. We usually are doing an actual Walkthrough video with the video camera or HDR photos. But if you wanted it, you could get this here. - I want to say for clarification, there's two things. If you scroll up just to the top, so everybody could see the details at this Media tab. So as a Default, Matterport automatically generates these, so it just shows up. - Right. - And you could decide on photos, for example, you want to do [SnapShots], you want to do SnapShots within Matterport Workshop, Tom will show us that, so that you say, "Oh, well I didn't like how they framed that particular photo. This is the view that I wanted." Or, "This is the 360 image that I wanted from the Matterport Tour." So I think we're talking about two things here, Tom, one is the Default videos and photos that Matterport just displays. And then second is if you have a desire to decide which photos that you want. On videos, you can't generate a video, but you could use a third-party company to generate a video from a Matterport Tour. Anything to add to that, Tom? - No, and I will say that I actually have done some extractions of photos for one particular client who didn't want to pay for HDR photos, so I have used it. But yeah, we'll go over how to do that. - Thank you. - In the Stats Tab, don't judge me, but there's no views. And that's because I just cloned this a couple days ago, so nobody's seen it. But this is where impressions would be, visits, unique visitors. You would see all that here. - Yeah, and I would add to this screen, Tom, there are third-party companies that provide robust stats using Google Analytics keys in order to tell you a whole lot. There are multiple vendors that provide a lot of information, including heat maps. Again, if you go to the We Get Around Network Forum, www.WeGetAroundNetwork.com, go up to the top, the tab that says, MarketPlace, and you can just go down to the category, Statistics, and find vendors that offer robust stats. Okay. - Before we go into the editing of this, if we were to click the Share button, here's where we can make the space private. We can add a Password to it. We can have it Unlisted, which means anybody with the link can view it, and we're still able to Publish it to other sites via the Matterport Add-Ons. Or we can make it Public. And here it says, "Hey, you haven't added any Keywords. Keywords help improve your space's visibility and search." So we can do all that here. And a tool that I use, I click Options, and then I'm able to get the Branded link by just clicking Copy Link. We can click Unbranded and click Copy Link. Unbranded just leaves off all of the agent information or that banner. And that's particularly helpful for agents who are posting to MLS because MLS doesn't like to advertise for the agents. - Well, what would be different between Unbranded and MLS-ready? - Yeah, let's go over that. So "With the Share link, presented by and contact details are hidden. All other public details, including address of the space, may be visible to anyone with the link." This one says, MLS-ready says, "With this Share link, presented by, contact details, VR, and external links are hidden. All other public details, including address, may be visible to anyone with the link." So it looks like they are just taking out the VR and external links from the MLS-ready. So when I'm providing links to residential real estate Tours to agents, I'll provide them the Branded and the Unbranded. I typically don't provide this one. - [Dan] Hmm. - And that's just a personal preference. I guess I could do Branded and MLS, but nobody's complained about getting Branded and Unbranded. - Okay. - And then there's an Embed Code. So if you're going to put it on a website, you can click this and get an Embed Code that you can put on your website. Down here, and we can go over this, we can invite Collaborators. So if you were somebody who just likes to press the button on the camera, which is me, I don't like to edit too much, I can invite an editor to get on here and update Tags, update, or create Highlight Reels, do all sorts of things. And so that's where you can do that here. You can also do that by going to Settings, and then Roles, and you can invite them as a Collaborator on your account. - Okay. - This one, by adding them here, just invites them to this particular Tour. And I think with adding them through Settings and Roles, that's going to invite them to your entire account. - Well, you have a choice. So you can invite people to a single model. - Correct. - Or to a folder that includes models that you only want that person to have access to, or your entire account. And it's... Do you want to talk about the process of how you invite someone as a Collaborator? - Sure. And I think you do it the same way, probably. So we'll create an internal email address. So it may be something like Matterport@ScanYourSpace.com, and I'll invite that account as a Collaborator, and then I'll give that account to a particular person that I want to have it. And as you were saying, you, I think, said that you made a few of them, and so you kind of just rotate through 'em. - Yeah, what I would suggest as a tip or maybe even a best practice, rather than inviting specific people to become a Collaborator is just create 10 email addresses, guest1, guest2, guest3, guest4, guest5, guest6, guest7@yourdomain.com, and then when you have a need for a particular client or a photographer maybe doing editing for you, give them guest1@yourdomain.com. And then when you're done, or when they're done, then just change the password, recycle the email address, and it's a way easier, faster workflow. - Yup. I concur. - Great. You want to take us back into... I took you off sharing if you want to- - Oh. - Jump back in. - Yeah. - And while Tom's setting up, you can find Tom's websites at www.ScanYourSpace.com and www.SparksMediaGroup.com. And also, Tom is pretty prolific posting in the We Get Around Network Forum. You can find all of Tom's posts at: www.WGAN.info/SparksMediaGroup. And in the We Get Around Network Forum, you can chat with Tom Sparks: @SparksMediaGroup. Back to you for the demo. - So click on these three dots here and you can get some more actions. So we can Share and Invite. And that's basically the same thing as doing it right here. We can create Folders within our account on Matterport. So we can have a Folder called Residential. We can have a Folder called, I don't know, Disneyland. And we can move the particular Tour around through Folders. We can copy a space, which is what I did with this one. I duplicated it within the account. We can Transfer space. So I have some clients that I scan for, and sometimes I'll upload them to my account, and then I'll transfer it to their account. So you can transfer from one Matterport account holder to another one right here. And then recently released on the professional plans, in the newer plans, are the ability to archive spaces. And you can do that here where it doesn't count as a space used against you for hosting purposes, but you're able to still keep it and not lose all that data. And if you ever need to bring it back, you can unarchive it. - Okay, great. - And then we can delete it. If you don't like it, we'll just hit the Delete button and away it goes. So should we get into editing? - Yeah, that'd be great. - Okay. - Thank you. - Sorry. So we'll click the Edit button up here. And this brings us into our Matterport Workshop. And so I guess the first thing is, if we want to change the Default Starting Location. Let's say I wasn't happy with this and I wanted to come back over here, and I want to make this view the start. So go there, and then we'll click on Start Location, and we'll hit Set Start Location, and then there is our start location. - Great. - So let's go to Labels. I like to edit this in Floor Plan View. So once we find something we want to label, we're going to click this Plus button, and we're just going to type in, living room, and then we'll call this the kitchen. - And where and when do those labels show up? - Good question. I don't use them too much. They show up in the Floor Plan View. - Okay. - Are you aware if they... I guess they may help with the drafters when they're creating the floor plans. They may use those labels to generate with the floor plans. - Good question. I don't know the answer to that. - [Tom] Okay. - When you were showing your Tour, I want to say it was using the, yeah, bottom-left Play Button, that it was showing the name and that name came from, boom, living room, where you named it. - No, I put that in, and I'll show you where to do that. - Ah. Okay, great. - Yeah, yeah. - Okay, glad I asked. - So yeah, that's how you do labels. You just continue on. And I don't really use this too much. So we've done thousands of Tours and I've used it a handful of times, but- - [Dan] Okay. - That's where you can do it. Measurements. This is, again, something I haven't used here, but we're going to just draw this wall out. And I'm going to assume that that may be on the Tour, viewable. Do you know the answer to that? - I don't. - Okay. Well, I guess we can test that theory out here in a little bit. - Okay. I want to say, if you put the measurement in there, yes, it's going to show up in the Tour. So there's really two things that we're talking about on measurements. One is having some Default measurements show up within the Tour. And then second is to enable anyone to do their own measurements or to disable that feature. - Correct. Yeah. And it looks like that's true because you can hide it here. - And I guess I could imagine, since you've done thousands of residential Tours, you really want to keep your workflow as fast as possible. Unless a client's paying you for you want Labels, you want Measurements within the Tour, you're not delivering any of that because it's not something that clients are asking for, and it's just something that's going to be time-consuming to do. But we thought during this demo, it might be helpful just to show how that's done in case you have a use case for that. - Yeah, and I think it's kind of based on the service provider and what they're offering. I have a colleague who tends to do Highlight Reels with every order, just kind of as his offering. And that's not something we do. And no agent has asked me, "Hey, I'm missing the Highlight Reel. Where's it at?" - Mm-hmm. - But at least it's available. I did use it recently. Actually, no, I didn't. I was going to say, I started to use it recently on a commercial space, but they decided not to use it once I had it done. - Okay. - So we'll go to Tags next. I like doing the Tags in the Dollhouse, or actually, I'm sorry, on the actual Tour view. But here, we can add a Tag. So click this Tag button and place it wherever you want. You can place it on a counter. And we'll say, "Beautiful countertop." We can change the color of it. We can change how high the stem is. We can add any Keywords, so that if you search it, it'll show up. And I'll show you this other stuff here in a minute, but we'll hit Save. And let me check one thing real quick. Let's do... We'll add a link to this. So if you want to know about this particular type of stove, we can say, "Frigidaire stove," and we can put a link to it. I don't know if that's an actual link, but we'll put it there. And maybe we want to make this one purple just to differentiate it as a link or as an appliance versus the countertop. And we can, again, change the stem length. Appliances. Hit Save. I'm going to go find a YouTube video, and I'll show you how to add media for YouTube. - Okay. While you're doing that, if our viewers are particularly interested in Tags, MatterTags, labels, there are many third-party service providers that do robust implementation. So if you have dozens or hundreds of Tags that you need to do, there's third-party solutions that enable you to easily, quickly, and efficiently manage a lot of Tags. And then there are also third-party providers that have, let's say, shopping integration. So on that stove, let's say that was in a showroom and you wanted to say, buy it, that it could literally take you to a Shopify cart and enable you to purchase it. And if that appliance was not in stock, then it wouldn't show the Tag on it. So all kinds of interesting things to learn more about that, www.WeGetAroundNetwork.com. Go to the tab at the top that says, MarketPlace, and look for things like shopping. Tom, I'm sorry, I took you off sharing- - Ah. - While you were researching your video. - Okay, let's go back and share. So here, we're going to create a video link, and I'll put a keyword in. Media, video. And then I'm just going to put a YouTube link right there. And this is one of our previous videos. - Mm-hmm, good choice. - Yeah, good choice. Okay. Can't go wrong with us. So we'll hit Save there. And then we'll come over here. And I'm going to use a picture I just randomly found of a door. But if you wanted to put maybe a close-up of a furnace to show maybe the year, make, and model of the furnace- - Mm-hmm. - Or the same thing with the inside of a fridge, you can see a serial number, there's a whole bunch of use cases on why you would want to attach media, but you would put that here. And you can put the stem on the door or on the floor or on the wall. You can put it wherever you want. And there you go. - Great. - So that's how you do Tags. - Do you want to show us that Tag with the photo embedded in it? Right there, and then maybe back to the Tag that had the YouTube video in it. Okay, cool. - Yup. There's a link. - There's the link. Okay, great. So that's... Was there anything else to show us in Tags? - Well, and I didn't provide much more information, but we could say something like, "Installed in 2022." - And while you're typing again, I'll just point out, if you have need for annotating Matterport spaces, and I would say on Steroids, there are, again, many third-party solutions that, for example, if you're in facilities management and you have a need to annotate and even communicate, there's a lot of solutions. If you're in the AEC space and you need to do all kinds of annotation, communication, around Tags, there are third-party solutions, and we talk about many of them in the We Get Around Network Forum. - Yup. So I just, here, put, "Installed in 2022." So you can have a whole vast description here of what you want to show. - Okay, great. - About Notes, I guess it would be similar to Tags in a way. We can place Notes wherever. So we'll put one right here. We'll say... And again, you can put links. You can have media or photos. I'll put my same door photo there. And there you go. So this would be more of the annotations, I would say. - Well, you know, it's interesting looking at that because what I was expecting when you clicked on that was actually the ability to communicate. And that may be in the public version of this Tour. So we're looking at the unpublished version. But my expectation was that there was an opportunity to communicate so that somebody wanted to say, "Oh, this needs to be fixed," then the person who's been assigned to go fix it could write back and communicate that it has actually been fixed. But I think of this as somewhat of a primitive version of communications. And again, there are third-party platforms that if you have sophisticated needs for annotation and facilities management, AEC, shopping, excuse me, the third-party solutions may be a better choice for doing that. So there's not a way to communicate on that particular one. That's interesting. - Well, no. So this, I just pulled this up. I don't know if you can see it. - Yeah. - Are you still able to? Yeah, so this is the public link. - Yeah. - And I just clicked on this, and now you can say, "This looks horrible." - Ah, there. So if you go back up to, yeah. But if you go up. So now there's a conversation within the space if you've allowed that. But if you go up to the Share button in the top right. - It just shares a link. - Okay. So now you can at least, again, I think of it as being a bit primitive, but you can share a link and ask somebody to comment back. So maybe you were asking a- - Yeah, and as I'm going on, maybe you can... I just texted you the link to this. Maybe you can get on and see if you can put a comment in there. - Yeah. - [Tom] See if it shows up. - Did you just send a text to me? - I did, yeah. - Yeah, so let's go take a look. Let's see. I don't see it in our private text conversation. - No, it's your... I'll chat about it to you, too. - Okay. - But I sent it to your cellphone. - Ah, I have it turned off. That's why. - Okay, okay, all right. Well, there you go. - I didn't want to take any calls during the show - - Yeah. - Okay, so I'm looking at the Tour, and that's interesting because I don't see the Note. - Interesting, okay. - Yeah. But we're going a little bit fast for a demo. - Yeah. - Had that demo worked, I think what would've happened is that I could have commented back. And it may be we have Notes set to private or the Tour set to private or something that's inhibiting that. But my expectation would be that I could comment, and then it would show up on the Tour, and therefore, think of it as a place-based conversation. - Yeah. - But again, I think of this as being a very primitive version of place-based communication. And there are third-party tools that, particularly for AEC or facilities management, that I would recommend instead. - Yup. So I guess I'll go on the Guided Tour, which is not something I do a lot, but we'll do it. I always save the painful part last. It's not painful, but I'm just not too used to it. But here is where we're going to add a Highlight Reel. So we find the angle we want, so maybe I want this angle, and I'm going to hit Add Highlight. And then from here, I can edit it and I can call... And this is where you saw the labels. So there you go. We can have behaviors. We can have it do a Walkthrough or a Slideshow. And then we can have it pan. So it can pan left, it can pan right, or it can do an auto 35 degrees. I tend to leave these alone. On the example that I showed you when we first got on the call, I had it set to Walkthrough, but we'll leave it on Slideshow here and I'll show you the difference of what it looks like. - Yeah. In fact, if you could pick three or four images quickly to- - Yeah. - To help illustrate that point, and then I'm going to throw you for a loop and ask you a question. - Lovely. - [Dan] Okay. - I love loops. - [Dan] Okay. - So there you go. We'll have that Slideshow, and then we'll come over here and we'll add that. - Incidentally, while Tom is setting this up, he's actually in a house. This is a house, correct? - Correct, yeah. - Yeah. A house that I want to say that you shot with a Matterport Pro3 Camera, a Matterport Pro2 Camera, a Matterport AXIS, a smartphone rotator. Were there any other devices? - Oh yeah, the Insta360 - You shoot Matterport with the 360 camera? - The Ricoh THETA Z1 and the Insta360 ONE RS 1-inch. - 1-inch, okay. So those five cameras, we actually did an entire show on this. And if you go to www.WGAN.info/SparksMediaGroup, you'll find that WGAN-TV Live at 5 show where Tom talks about the differences of like how do the Tours look different and which camera for what use case, et cetera. Okay, so if I wanted to- - Yeah, and just to piggyback on that, I've done actual video Walkthroughs of me recording the entire process with all those cameras. And I have those along with the Tour links to the actual Tours on my YouTube channel so that people can compare apples to apples and color quality through the different cameras. - And Tom's YouTube channel is the @SparksMediaGroup. - Correct. - Okay. - So I- - Oh, so here's where I want to throw you for a loop- - Yeah. - If you could go to Dollhouse View, and take a screen grab from there, make that one of yours to add to the Highlight Reel, and then maybe you could move that over in the middle. You could... No, no, if you could just take- - Oh. - Yup, and then relocate it, boom. Now you could show us what that looks like. - You've done this before. - Yeah, it's a nice feature. - Okay, so I'm going to hit the Preview button. We'll just watch this. So here we are panning to the right, and then it does kind of a fade-to-black transition. It doesn't do the like zooming- - So that's the Slideshow view. - [Tom] Correct. - Okay, now- - So I'm going to keep hitting it. We're going to pan. And I think on this next one, it's going to be the Dollhouse view. There you go. So this is a good way to teleport you from downstairs to upstairs or- - Yes, exactly. Boom, you nailed it. But if you could go back and do it as a Walkthrough. - Yeah, so what I would do to change it is click on Walkthrough, and then Apply to All. - Yes. - And then hit Done, and then we'll hit the Preview. And now it does a nicer, I think, a nicer transition than just kind of fading to black and going to the next panel. - I want to get at least past that Dollhouse view just to show what that looks like. Which I would suggest is a transition if you might be going from the first floor to the second floor as part of doing that Walkthrough experience. - Correct. - I also think it's... Does this loop? So when you get to the end, does it go back to the beginning? - It's a good question. It does not. - Oh. - Not in the preview anyway. - Oh, okay. I could be wrong, but I want to say it'll actually loop back to the beginning. And if that's the case, then you might put a Dollhouse view at the end so you end the second floor on a Dollhouse view that now points back to the first floor. - Yeah, well, let's check it out real quick. This is live once the changes have been saved. - I see you have 360 Views outdoors. I'm guessing you don't do that too often now that you have a Matterport Pro3. But for those models that you're shooting with a Matterport Pro2 and you do add a 360 view, any place in Workshop that you're doing something? So it just stopped when it got to Tour Complete. - Yeah. - Okay. - Yup. - So I guess I made that up that it looped back. Can you go back to the edit part of it? - Yup, we're right here. - And I think we were back on the Highlight Reel. So Add Highlight, Tour Settings. So there we go. So I see you're doing a Story Tour, which is that first version, but if you set it to Highlight Reel, now we'll see the Thumbnails at the bottom. - Oops. X that out. There you go. You got the Thumbnails at the bottom. - So, and there's a little caret to go up or down, and play. And this way, if you want to display those buttons at the bottom or what I think of Thumbnails and what Matterport calls a Highlight Reel, then it gives the person viewing the Tour the option to jump from space to space to space by clicking on that Thumbnail. And then if you could go back to that, how you did that to show the Highlight Reel, Tom. So you see, the button is checked, "Allow visitors to play and pause the Tour." I would say, sometimes you may not want to do this if you were, let's say, at an exhibit and you didn't want people to interrupt the Tour and you wanted it just to play. A client might have a computer set up in a lobby as people walk in, and you don't necessarily want to give people that opportunity to play Tour, and that's what that is. And then the highlight, highlights, again, is to show a series of some Thumbnails for each stop. That's what Tom just enabled. And then you can not have... Right, you can not have any of this show up. - Yeah. - And then I think you're going to show a couple other options. - So transition, again, you can globally, within the Tour, set it to Slideshow or Walkthrough. And you can always override it for each highlight that you're doing. You can change the speed of the Walkthrough, and that's the transition speed. And you can change the speed of the Slideshow here. And then with panning, again, we can do left, right, auto. The rotational speed, the Dollhouse rotational speed, floor plan zoom speed. So you can really kind of dial it in to what your preference is. And that could be good for a larger space. You may want to speed it up. A slower space, you may want to slow it down, that sort of thing. - Cool. And that, again, I would add here that if you're particularly interested in Highlight Reel and Walkthrough, there are third-party platforms that kind of do this on steroids and even simplify the workflow some, so- - [Tom] Yeah. - Again, www.WeGetAroundNetwork.com, go up to the top. It says, MarketPlace. You can look for solutions. Anything else to show us on Highlight Reel Walkthrough? - Not that I can think of. - Yeah, I guess I would just add, when you showed the last part where you can have, you can adjust, does it pan left? Does it pan right? Is the transition quick? Is it not quick? Is it zooming in? It's not zooming in? All those different features, you're probably not using on a residential real estate listing where you're not making a whole lot of money because all this stuff takes time. But you might have a client that's a museum or some other event space where it may make sense to do a deeper dive to tweak this. And that may be one of the ways you can help differentiate yourself from another Matterport Service Provider because you walk in and you have this awesome Walkthrough experience that someone else hasn't figured out how to master rotation speed, Dollhouse rotation speed, floor plan zoom speed, transitions, et cetera. So a nice way just to stand out when you have the appropriate client. - Yeah, yup. So from here, we can talk about this. This is... We tend to, or I tend to overscan and get more than I need, but maybe you don't want to show certain scans, so we can hide them. We can click on it, and then... Did I lose ya? - So I'm still here if you can hear me. - Okay. Yeah, my screen... - Okay. I'll try taking it off screen share and see if that helps clear it up. You want to try sharing your screen? Do you see me again? - Yeah, hold on one second here. My entire screen just froze up. - Okay. I see you fine. So while Tom is figuring that out, and if necessary, just restart, rejoin, that's fine. You can visit Tom's websites at www.ScanYourSpace.com, www.SparksMediaGroup.com, in the We Get Around Network Forum, @ScanYourSpace. That's the symbol, the at symbol, @ScanYourSpace. And again, Tom is super-prolific about publishing to the We Get Around Network Forum and always has interesting videos to share. You can find all his posts at www.WGAN.info/SparksMediaGroup. And I just add that, even today, Thursday, November 2nd, 2023, Tom posted in the We Get Around Network Forum a Tour of Matterport headquarters. Tom, are you back? - Can you hear me? I'm back. - I can. I can hear and see you. - Yeah, so I don't know what happened, but it didn't like me hiding scans. It froze my browser. - Okay. And I don't think that that's Matterport's fault. I think because we got so much technology going on with how we do"WGAN-TV Live at 5, and then we're doing some things in terms of demos, I could imagine there'd be some- - Yeah. - Glitches. So if we go back to Matterport Workshop, and I guess I would point out or ask, what would be some of the reasons you overscan? What are some of the reasons you hide scans? - Well, my thought process is I'm there on site, I might as well capture everything I can or everything I'm allowed to. And if the client doesn't need it, they don't need it. But if they decide they want it later on, they don't have to send me back. One example is I've scanned a BMW dealership that was new construction for the construction company, and we scanned the entire dealership, the entire lot. And the construction company was using it for marketing purposes to show kind of their build quality and material quality. And they did not want certain sensitive areas shown to the public. So that could've been the parts department. It could've been the owner's office, whatever that is. So we hid those scans from the Tour. You're still able to see it on the Dollhouse view, but you're not able to see it just by clicking or walking around. So that's why you'd want to hide. - Yeah. I mean, I would add to that, if you're scanning a house and you can't get the client to pay for the garage to be scanned, it happens. But the Dollhouse looks way better with the garage, go scan in the garage, and then at least the Dollhouse, the house looks complete, and then you can disable the scans, and then maybe your client might come back and say, "Oh, I couldn't walk into the garage." "Well, you didn't pay me for that. Happy to enable that if you want. That's an extra $25." ;-) I don't know. - Upsell. Yeah, and another purpose related to residential would be scanning the garage, scanning inside of closets for floor plan accuracy. - Mm-hmm. - Where maybe you don't want somebody to see a cluttered garage, but you want the floor plan to be dimensionally accurate. So we would scan it, get the floor plan, and hide the scans after the fact so that people can not walk there- - Great example. - Yeah. - So go, please, share your screen. While Tom is doing that, again, you can disable scans so that someone can't walk through a room, for example, but those scans do show up in the Dollhouse, which is actually a good thing because it makes the three-dimensional model look nice. - [Tom] Yeah. - Yeah. - So I did this house with the Pro2. Now that I have the Pro3, and I did this house with the Pro3, I scanned the entire outside space. But with the Pro2, there's some limitations on getting 3D scans outside, so we do 360s. And those are viewable on the Tour by clicking on the actual icon. And I'll show you that in a second. Just to talk about the 360s, it still spins like it's doing a 3D scan, although it's disabling the infrared feature for taking measurements. And then once it's scanned, it downloads on your device on the bottom right. So you'll see the mini-map [on your iPad] and you'll see all your scan points as you're going throughout the process. But when you switch to 360s, it displays that on the bottom right. When you click that, you can then place that particular 360 on the mini-map where you think it should be. And I think it uses some sort of GPS or geolocation kind of technology. And it's usually kind of in the right ballpark, and then you just have to move it over to, you know. - Are you able to show us that? - Not on the device. I'm wondering if we can show it here. I don't know. I guess it might be. Maybe not. Oh, yeah, so here. Here's all the 360s that I placed on the device, and then- - So let me just tee this up for you. - Yeah. - For clarification, a Matterport Pro2 Camera, for example, you have a choice of creating 360 Scans or 360 Views. So when you open your iPad or Android tablet, it's going to Default to 360 Scans. But if you need a 360 View, and typically, that's going to be outdoors where you can't do a 360 scan because of sunlight, you're going to set the setting on your iPad to 360 View, and then it's going to create one of these three things that we're looking at here. And so Tom is going to... And then Tom actually has two ways to move a 360 View. One is to reorient it on his iPad tablet. Or now that he's in Matterport Workshop, you can adjust the location of the 360 View. - Yup. - So tell us what you're doing there. - So I just clicked on it, and then I can move it around where I think it should be. This is obviously probably easier to do on-site because you're there, you're familiar with the property, you know right where it would be. But we can click this little Preview button and it will show us the scan that we did. - Your 360 View that you did. - Yeah, and then we can jump to the next one by clicking on it. Yeah, that's how you place them. - So how did you... If you go back into the living room and there was a little symbol for the 360 View, how did that symbol get on the glass door? - Ah, let me go back. Hold on a second here. The symbol got on the glass door, and Matterport placed it there. That wasn't me. - So that's done automatically just as the Tour is assembled automatically by Matterport? - Correct. - Okay. So on that glass door, somehow, some way, it knew to orient the 360 View that's outside to show it right there on that sliding glass door. - Yeah, and I think that just kind of was luck or whatever. This one is on the wall because I think it's just straight ahead out there. - Can you move it? - I think we can. Ch, ch, ch, ch, ch, ch, ch. This. And I'll say that when we're placing it on the map within the device, you can actually rotate the image so that the wall of the house, for example, is facing downwards towards the wall on the mini-map. - Yeah, so that the orientation is correct, like you don't walk outside, and all of a sudden, you're looking back at where you came from. - Yeah. So I'm just going to put this right here real quick, and we'll see. - Right. So all you did was drag it, and then it should know where to place it inside. - Yeah. If we go over to this side of the house, we now see it over there. - Yeah, okay, cool. All right. - I'm going to keep these links available, so maybe we can share them with everybody. So I'm going to put this back kind of where it was. - Okay, cool. So if you want to see the finished Tour, you can go to the We Get Around Network Forum after the show. Tom has sent me the link. I'll embed the Tour link in the We Get Around Network Forum post about today's show. Did you want to send me the "before" or just the "after"? - I can send both. Yeah, that's fine. - Okay. - [Tom] A bit of technical difficulties again. - Okay. So while you're checking that out, I'm just kind of covering this, see what things we've covered. So far, we've covered how to set the Starting Point, how to add Matterport Labels, how to add MatterTags, how to create the Matterport Highlight Reel, how to add a Matterport Note. We haven't yet covered how to take SnapShots. - Yup, so we'll do photos, blur. - And we did see how to, where to download an auto-generated Matterport video, or for that matter, photos, or SnapShots. We didn't look at trimming and spray. Can we take a look at SnapShots and how to trim the matter? - Yeah, yeah. Why don't we just... Do you want to just continue down the list and we'll do SnapShots, and then we'll use that? - Yeah, that's great. - Okay. So to do SnapShots, we're going to click on Photos, and we're going to zoom in on the SnapShot we want. And we're going to click on this camera icon. It takes a picture, and then it saves it. And then we'll come over here, for example. And I'm just going to focus in on this chair, hit the SnapShot button, and then we can view, see what we've done. We can go back to photos. And that's where they all are. So that's how you do a SnapShot. - Okay, that was easy. - [Tom] Yeah. - Oh, actually, there's an icon to the right of the camera. What's that for? - Just to view the Gallery. - Okay, great. I guess I was expecting to download 360s on that button. So is there- - Not here. To do a 360, you'd go to 360 Pano at the top right. - Ah. - And then take a SnapShot. - So for clarification, if you have a need to download a 360 from Matterport, you are able to do that. And so that's the button at the top where you're moving from the 2D View to the Pano View, or panorama view, or what I call a 360 view. - Yeah. And here's the 360. - So what you were able to do with the SnapShot was orient where you wanted the midpoint to be in that 360 View, which might matter if you were posting that 360 as an example to Facebook. - Yeah. Now this is disabled. "Include measurements, labels, and Tags, and photos for 2D-only and show grid." And I have this one disabled and this one's enabled. And I haven't used this, so I'm not really sure. - Oh, so that's interesting. So if you wanted to take some measurements... So imagine you want to send off a photo, but you want to annotate that photo to include measurements and labels and Tags in the photo, then Tom could just toggle that little button on. And when you do your SnapShot, then it's going to include any Tags or measurements, the annotation that you've done. So there are a lot of different bells and whistles. If we tried to do everything during this show, we'd overwhelm you. - Yeah. - But I think you're kind of, as a viewer, getting the gist of what you can do. All the way down at the bottom, there's that 360 that Tom just did. And then I see an arrow there, Tom. So presumably, you could hit that and you could download that individually, or you could start checking boxes and download all your images in one shot. - Yup. You can start checking them and hit the download up here or delete. - So if you hit the download button at the very top of that set of images, then you're going to download all of your images. - Correct. - Do you get an email that says your images are ready? Or does it download a ZIP file right to your desktop? - I think it downloads a ZIP right to your desktop. - Okay. - Yeah. So we'll go back to edit, and we can cover blur. - Okay. - So again, blur's helpful for blurring out passwords, or family photos, or just trash. You didn't want trash to show. The car dealership that I did, they had certain items, certain sales figures and stuff that were on whiteboards they didn't want to show. So we click on the Blur icon, hit the plus arrow, and then I'm going to blur out this book. But let's say this Blur brush was too big for it, I can make the size of the brush smaller or larger. - Mm-hmm, mm-hmm. - So go there. And then we just click on our mouse and move it around. And as we're moving it around, it blurs it out. - Mm-hmm. - And- - And I presume you're going to hit the check mark to accept that. - Correct, and then we- - And can you undo that blur now? - [Tom] Can. You can unhide it. - [Dan] Okay. - Delete it. And then once we have everything blurred that we want to blur, we're going to hit Apply Blur. And it says, "This will apply one blur to a scan in the model. It will take a few minutes-" - But- - "Until the blurs are fully applied. Once applied, they can no longer be editable." - Okay. That means you can't eat them. ;-) - Editable. - Edit, editable. Okay. - Editable, yeah. - Okay. - This does take a while. The car dealership, I blurred about 37 items, and it seemed to have taken a long time to do that. - Yeah, it's too bad it's not designed kind of like an Apple experience where you could undo. Because I could imagine you get to the car dealership, and, "Oh, I really wanted you to be able to see that. Why'd you blur that one? Could you redo that, please, and unblur it?" "No, can't do that." - Yeah, yeah. Well, some things in life are final. - Yup. - Just got to deal with it. - Okay, yup. - So from here, I think we can go on to trim? - Yes. - Trim is something that I've used a little bit. I'm still trying to get used to it. But let's say... And this one, I marked it fairly well. There's a little bit of overspray right here that we can try to tackle. But this is how we would do it. So I like to do it in the Dollhouse view. And I'm going to hit the Add Trim button. And then it's going to create this nice, little box, which I'm going to click on and move around. And as you move it around, you'll see that it blacks out certain areas in the house. So what I'm trying to do is get this little wing out of there. And so I'm going to do that by moving it around. And you can see, as I did it, it chopped off some of it, but it's not all of it. So we're going to go right about there. That looks good. And then we'll hit the check box. And now, if we were to look at our Dollhouse view, I think it applies it right away. So I'm going to go back to our live view. And the wing is gone from right here, like all of it. - Yeah. - But... - So I want to say probably best practice is to trim mirrors, windows, outdoor lines while you're scanning so that you don't have to do this in Matterport Workshop. So this kind of saves you just in case. - [Tom] Right. - That you can trim this extra spray. There are edits that you can't do on your tablet. Sometimes you might be doing a spiral staircase or something and you got... What would you call it? Ceiling windows. - Ceiling matter. - So you have windows in the ceiling, and then all of a sudden, you've got splatter that's going above the house. This would be the process for taking that splatter, that matter, the extra scan data out of the model just so that it looks nice. And I want to say, Tom, I think I heard you say you don't use this that often. Is that right? - I don't. I try to mark everything as accurate as I can. However, at that car dealership, the pesky car dealership, there was a lot of artifacts that were still left on the Tour, even though I marked everything meticulously, and I had to go back and do this, so this is- - Yeah. I would say, sometimes you have to separate your world and say, are you an artist or are you a business person? And if you're an artist, you can make all your Tours look beautiful and you can add a Highlight Reel. There's a lot of things that you can do in post, but you may not be able to monetize all that extra time that you're spending. So it's probably a lot faster just to trim as you go during the capture process. At least you know how and where to find this particular tool and that you can trim this extra splatter. But you can see, it does take some time, and all these steps add up. It's probably not for a $250,000, $350,000 house. But maybe you're working on an $8 million house and it's 12,000 square feet. It might be worth taking the time because it's a higher-end property. Your client's paying you a lot more to deliver the property. And the expectation is it probably looks nicer. Okay, great. - Yeah, and I'll just say that this is beta, so take that with a grain of salt. Sometimes it could work. Sometimes it won't work. - Yeah. - Sometimes it's glitchy. - Well, it's probably pretty good because it's been in beta, I want to say, for a year now. It seems like a long- - Yeah. - A long, long time. - No, I haven't had... I just was trying to place this one, and it kept snapping back to a different area, so that's why I kind of just- - Yeah. - Highlight that out. But no, it works good, I would say. - Okay. So Tom, I actually think we're done. Was there something else that you wanted to show us? - No, I think we've covered it, right? - Yeah, I think so. Before we go, is there any final comment on the Matterport Workshop workflow? - No. Well, I will say, kind of piggybacking off of what you said, it's best to do everything in device while you're on-site just because you're familiar with the property. You're there. You know where the mirrors are. You know where the windows are. Mark everything there. I've gotten lazy and not done that, and then got home, and it's really tedious to refamiliarize myself with the property on the device when I'm sitting on my couch. So do it while you're on-site. Saves a whole lot of time. - Cool. Tom, thanks for being back on the show. - Thanks for having me. I appreciate it as always. It's a pleasure. - Thank you. We've been visiting with Tom Sparks. Tom is Founder of Scan Your Space, Founder and CEO of Scan Your Space, a division of Sparks Media Group. You can find Tom at www.ScanYourSpace.com, www.SparksMediaGroup.com, and the We Get Around Network Forum, @ScanYourSpace. All his We Get Around Network Forum posts are Tagged www.WGAN.info/SparksMediaGroup. And his YouTube channel, @SparksMediaGroup. For Tom, I'm Dan Smigrod, Founder of We Get Around Network Forum, and you've been watching WGAN-TV Live at 5. |
||
| Post 2 • IP flag post | ||
Pages:
1This topic is archived. Start new topic?