Matterport Dollhouse in Blender? How to Tutorial?18526
Pages:
1|
|
PhilDark private msg quote post Address this user | |
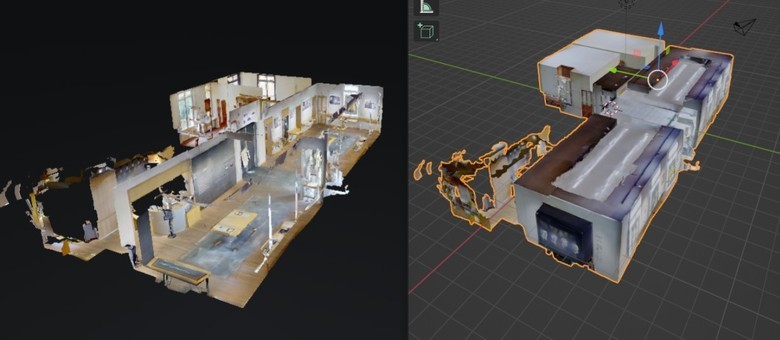
Hello, in this image on the left the Matterport view (in the tour), on the right the .obj file from the MatterPak displayed in Blender. The walls and ceiling materials are single-sided in MP, so you can't see them from the outside, while they are double-sided in the pack. Or a something about the normals to be inverted? Does anyone have an idea of the procedure to have the same rendering of the model in blender? (so with the exterior walls and the ceiling not visible when outside the model). I did a lot of research without success, a little tutorial (or some info) on the subject would be great. Thank you ! |
||
| Post 1 • IP flag post | ||

|
RichardStanton private msg quote post Address this user | |
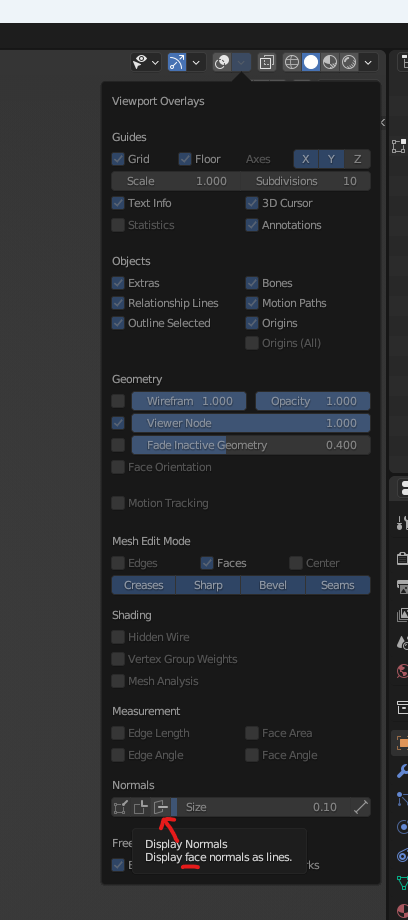
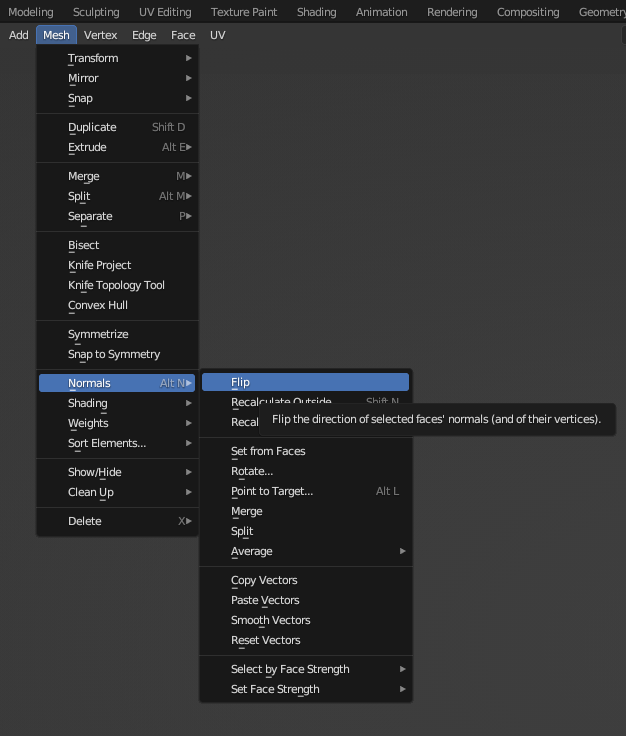
| You are on the right track with the normals. The simple way to think of it is to think of the normals as how the orientation of a surface on a polygon is facing. Since rendering is all about light and how it interacts with an object, the normal obviously has a huge impact on how or if light will interact with a surface. The first thing I would recommend is that you turn on the visibility of your normals. In Blender visibility is handled through overlays. (Edit mode > Viewport Overlays > Normals > pick one) > I took a screenshot and annotated it for you  Making the face normals visible will go a long way toward helping you figure out exactly what you are facing (ha! no pun intended  Now keep in mind that flipping a normal does just that, flips it. This means that it does nothing to orientation, so you can end up going from one kind of messed up to whole different kind of messed up depending on the consistency and quality of your source. Unfortunately I am not much of a Blender person as I prefer the more CAD oriented 3d applications like Fusion 360, Rhino, etc. So I cannot help you very much with advanced Blender workflow (blender does some things VERY differently from CAD based 3D design apps, alien-like ways)! I hope that this at least helps you get pointed in the right direction in Blender though |
||
| Post 2 • IP flag post | ||
 WGAN Fan WGAN FanClub Member Queensland, Australia |
Wingman private msg quote post Address this user | |
Quote:Originally Posted by PhilDark I believe it just Blender shows you backsides of all faces and because there is light in your scene lighting your model from outside you can see through in the viewport mode. It should not be rendered if you try to do it because normals are all pointed inside the model. You can check it by going to viewport overlays and turning on Normals there. |
||
| Post 3 • IP flag post | ||
|
|
PhilDark private msg quote post Address this user | |
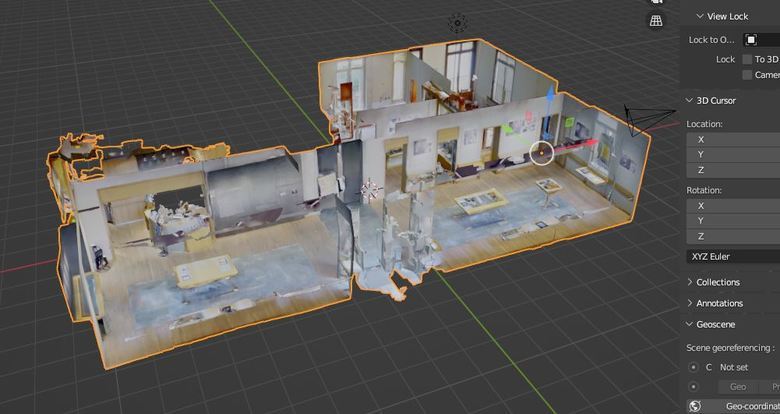
| Thanks for your help. But finally this is not a matter of normals, as they are in the right direction for all the faces. I solved the issue using BackFace Culling, which hides backsides of faces. This video helps a lot : https://youtu.be/_GgTx49QyyM And it works as you can see  |
||
| Post 4 • IP flag post | ||
Pages:
1This topic is archived. Start new topic?


